What Takes Off Tar From Car Paint: A Comprehensive Guide
Discovering tar on your car’s paint is never a pleasant experience. Those stubborn black spots not only detract from your vehicle’s appearance but can also damage the paint if left untreated. Understanding what takes off tar from car effectively and safely is crucial for maintaining your car’s pristine condition. This guide explores various methods, products, and preventative measures to help you tackle tar removal like a pro.
Understanding Tar and Its Impact on Car Paint
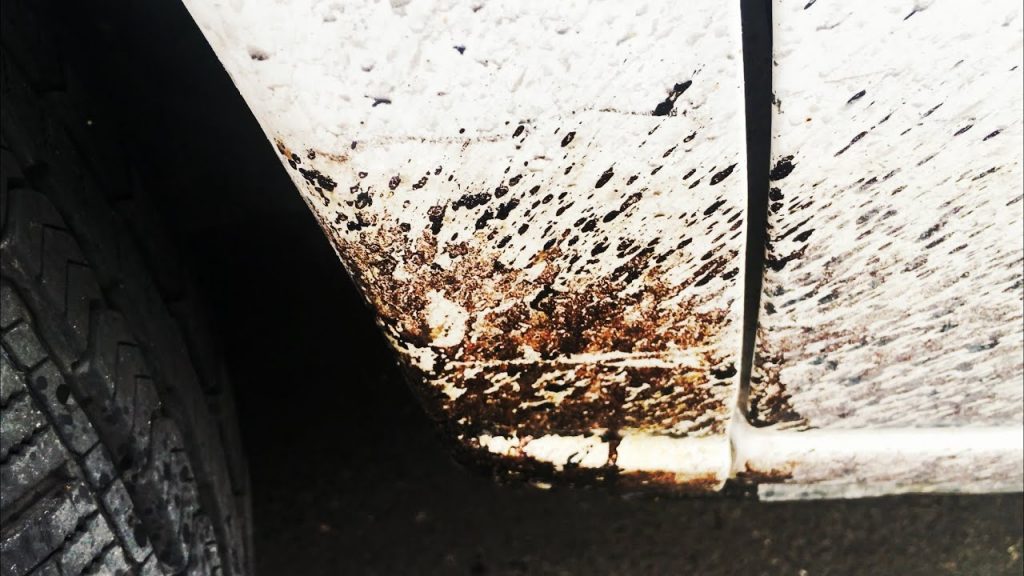
Tar, a byproduct of asphalt and road construction, is a sticky, viscous substance that easily adheres to car surfaces, especially during hot weather. Its composition includes various hydrocarbons and oils, making it particularly challenging to remove. When tar splatters onto your car, it can quickly harden and bond with the paint, potentially leading to:
- Paint Damage: Tar contains chemicals that can corrode and etch into the clear coat over time.
- Discoloration: Prolonged exposure can cause discoloration, particularly on lighter-colored vehicles.
- Reduced Resale Value: Visible tar spots detract from the overall appearance, affecting the car’s resale value.
Therefore, prompt and appropriate action is essential to remove tar without causing further damage. Knowing what takes off tar from car paint effectively is key to preserving your vehicle’s finish.
Effective Methods for Tar Removal
Several methods can effectively remove tar from your car’s paint, ranging from DIY solutions to specialized products. Here’s a breakdown:
Commercial Tar Removers
Commercial tar removers are specifically formulated to dissolve tar without harming the paint. These products typically contain solvents that break down the tar’s adhesive properties, making it easier to wipe away. When selecting a tar remover, consider the following:
- Paint Compatibility: Ensure the product is safe for your car’s paint type.
- Ease of Use: Opt for a product with clear instructions and easy application.
- Effectiveness: Read reviews and consider the product’s reputation for removing stubborn tar spots.
To use a commercial tar remover:
- Wash and dry the affected area.
- Apply the tar remover directly to the tar spots, following the product instructions.
- Allow the remover to dwell for the recommended time (usually a few minutes).
- Gently wipe away the dissolved tar with a clean microfiber cloth.
- Rinse the area thoroughly with water.
- Wax the treated area to restore protection.
DIY Solutions
If you prefer a more natural or cost-effective approach, several DIY solutions can also effectively remove tar. Here are a few options:
WD-40
WD-40 is a versatile lubricant and solvent that can dissolve tar. Its lubricating properties help to lift the tar without damaging the paint. To use WD-40:
- Spray WD-40 directly onto the tar spots.
- Allow it to sit for a few minutes.
- Wipe away the dissolved tar with a clean microfiber cloth.
- Wash the area with soap and water to remove any WD-40 residue.
- Wax the treated area to restore protection.
Peanut Butter
Believe it or not, peanut butter can be an effective tar remover due to its high oil content. The oils in peanut butter help to break down the tar’s adhesive bond. To use peanut butter:
- Apply a generous amount of peanut butter to the tar spots.
- Let it sit for 10-15 minutes.
- Wipe away the peanut butter and dissolved tar with a clean microfiber cloth.
- Wash the area with soap and water to remove any peanut butter residue.
- Wax the treated area to restore protection.
Cooking Oil
Similar to peanut butter, cooking oil can also dissolve tar. The oil penetrates the tar, loosening its grip on the paint. To use cooking oil:
- Apply cooking oil to the tar spots.
- Let it sit for several minutes.
- Wipe away the dissolved tar with a clean microfiber cloth.
- Wash the area with soap and water to remove any oil residue.
- Wax the treated area to restore protection.
Clay Bar Treatment
A clay bar is an abrasive tool used to remove contaminants from car paint. It can also be effective for removing tar, especially when combined with a lubricant. To use a clay bar:
- Wash and dry the car thoroughly.
- Spray the clay bar lubricant onto the affected area.
- Gently rub the clay bar over the tar spots, using light pressure.
- Continue until the tar is removed, kneading the clay bar periodically to expose a clean surface.
- Wipe away any residue with a clean microfiber cloth.
- Wax the treated area to restore protection.
Preventative Measures to Minimize Tar Buildup
Prevention is always better than cure. Taking preventative measures can significantly reduce the amount of tar that accumulates on your car. Here are some tips:
- Avoid Road Construction Areas: Whenever possible, avoid driving through areas where road construction is underway. These areas are often hotbeds for tar splatter.
- Park Strategically: Park away from freshly paved roads or areas where tar is being applied.
- Regular Washing: Wash your car regularly to remove any tar before it has a chance to bond with the paint.
- Waxing: Apply a coat of wax to your car’s paint. Wax provides a protective barrier that prevents tar from directly contacting the paint, making it easier to remove. [See also: Best Car Waxes for Protection]
- Paint Protection Film (PPF): Consider applying paint protection film to your car. PPF is a clear, durable film that protects the paint from scratches, chips, and tar.
Tools and Materials You’ll Need
Before you begin the tar removal process, gather the necessary tools and materials:
- Tar Remover: Choose a commercial tar remover or DIY solution.
- Microfiber Cloths: Use soft, clean microfiber cloths to avoid scratching the paint.
- Wash Mitt: For washing the car before and after tar removal.
- Car Wash Soap: A gentle car wash soap to clean the area.
- Water Hose: For rinsing the car.
- Clay Bar and Lubricant (Optional): For more stubborn tar spots.
- Wax: To protect the paint after tar removal.
- Gloves: To protect your hands from chemicals.
Step-by-Step Tar Removal Guide
Here’s a detailed guide on how to remove tar from your car’s paint:
- Wash the Car: Begin by washing the car thoroughly to remove any dirt and debris. This will prevent scratching during the tar removal process.
- Dry the Area: Dry the affected area with a clean microfiber cloth.
- Apply Tar Remover: Apply your chosen tar remover (commercial or DIY) to the tar spots. Follow the product instructions for dwell time.
- Wipe Away Tar: Gently wipe away the dissolved tar with a clean microfiber cloth. Avoid using excessive pressure, which can scratch the paint.
- Inspect and Repeat: Inspect the area to ensure all tar is removed. If necessary, repeat the process.
- Wash Again: Wash the area with soap and water to remove any residue from the tar remover.
- Dry Thoroughly: Dry the area with a clean microfiber cloth.
- Apply Wax: Apply a coat of wax to protect the paint and restore its shine. [See also: How to Apply Car Wax Like a Pro]
Common Mistakes to Avoid
To ensure a safe and effective tar removal process, avoid these common mistakes:
- Using Abrasive Materials: Avoid using abrasive materials like steel wool or scouring pads, as they can scratch the paint.
- Applying Excessive Pressure: Avoid applying excessive pressure when wiping away the tar. Let the tar remover do the work.
- Ignoring Dwell Time: Failing to allow the tar remover sufficient dwell time can make the process less effective.
- Using Harsh Chemicals: Avoid using harsh chemicals like gasoline or acetone, as they can damage the paint.
- Skipping the Wax: Skipping the waxing step can leave the paint unprotected and vulnerable to future damage.
When to Seek Professional Help
While DIY methods can be effective for minor tar spots, severe or widespread tar contamination may require professional attention. Consider seeking professional help if:
- The tar is deeply embedded in the paint.
- You are uncomfortable using chemicals or DIY solutions.
- You lack the necessary tools or experience.
- The paint is already damaged.
Professional detailing services have the expertise and equipment to safely and effectively remove tar without causing further damage. They can also provide paint correction services to restore the paint’s appearance.
Conclusion
Removing tar from your car’s paint is essential for maintaining its appearance and preventing long-term damage. By understanding what takes off tar from car and following the methods outlined in this guide, you can effectively tackle tar removal like a pro. Whether you choose commercial tar removers, DIY solutions, or preventative measures, the key is to act promptly and use the right tools and techniques. Regular maintenance and proactive care will keep your car looking its best for years to come. Remember to always test any product in an inconspicuous area first to ensure compatibility with your vehicle’s paint. Knowing what takes off tar from car paint safely is the first step to keeping your car looking its best. The right approach to what takes off tar from car can save you time and money in the long run. Always prioritize safety and follow instructions when addressing what takes off tar from car paint. Understanding what takes off tar from car also means knowing when to seek professional help. When dealing with what takes off tar from car, prevention is truly better than cure. Choosing the right method for what takes off tar from car depends on the severity of the contamination. Proper care in what takes off tar from car will ensure your car’s longevity. For effective what takes off tar from car, always use clean materials. Addressing what takes off tar from car promptly prevents further damage. Remember, knowing what takes off tar from car is an investment in your vehicle. By carefully considering what takes off tar from car, you ensure your vehicle’s protection. Ultimately, understanding what takes off tar from car is about maintaining your vehicle’s value and appearance.
