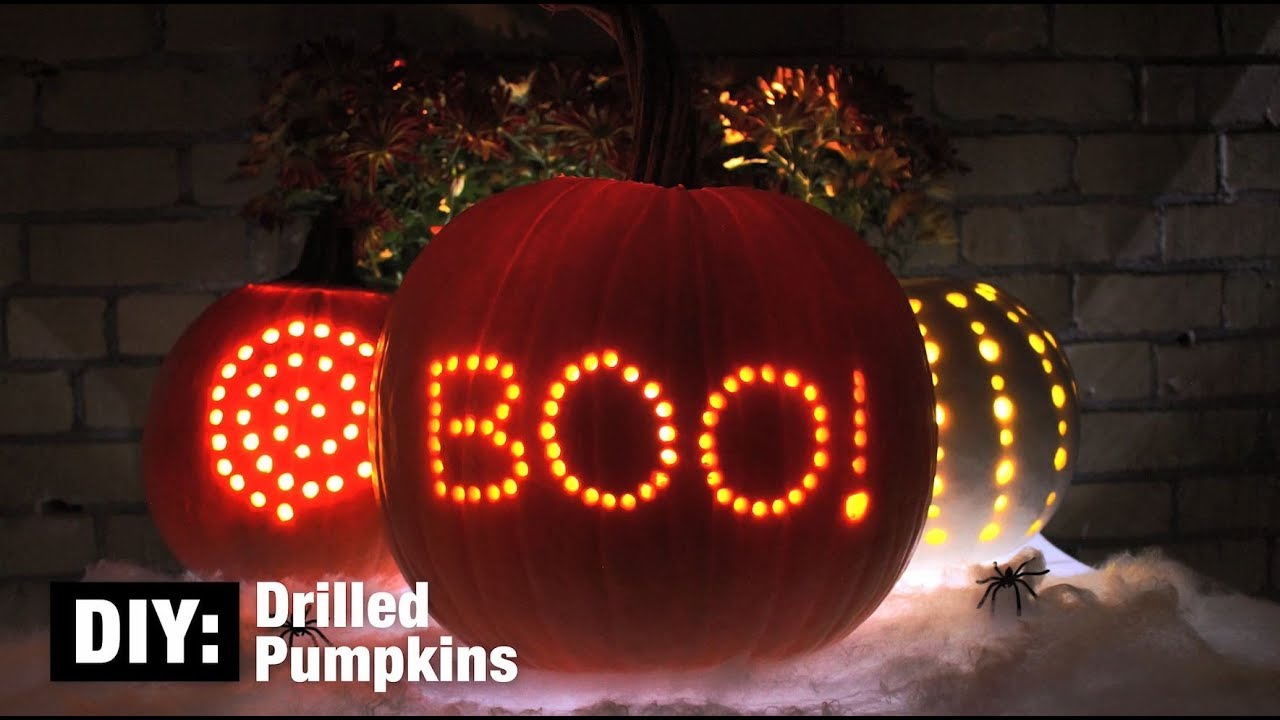
Unleash Your Inner Artist: The Ultimate Guide to Drilled Pumpkin Templates
Halloween is just around the corner, and what better way to celebrate than by carving a pumpkin? While traditional carving is a classic, have you considered taking your pumpkin decorating skills to the next level with drilled pumpkin templates? This method offers a unique and intricate way to illuminate your jack-o’-lantern, creating stunning visual effects that are sure to impress. This guide will walk you through everything you need to know about using drilled pumpkin templates, from selecting the right tools to finding the perfect design.
Why Choose Drilled Pumpkin Templates?
Traditional pumpkin carving can be messy and, let’s face it, a bit basic. Drilled pumpkin templates offer a more refined and elegant approach. Here’s why you should consider giving them a try:
- Intricate Designs: Achieve detailed and complex patterns that are difficult to replicate with traditional carving.
- Unique Lighting: The small holes create a beautiful starlight effect when illuminated.
- Longer Lasting: Drilled pumpkins tend to last longer than carved pumpkins because less of the pumpkin is exposed.
- Less Mess: Drilling creates less pulp and mess compared to carving.
- Creative Expression: Drilled pumpkin templates allow for a wider range of artistic expression.
Essential Tools for Drilled Pumpkin Templates
Before you dive into your project, make sure you have the right tools. Here’s a list of essentials:
- Pumpkin: Choose a pumpkin that is smooth, firm, and free of blemishes. The size will depend on the complexity of your chosen template.
- Drill: A cordless drill is ideal for maneuverability.
- Drill Bits: A variety of drill bit sizes is crucial for creating different effects. Start with a set that includes sizes ranging from 1/16 inch to 1/4 inch.
- Drilled Pumpkin Templates: You can find these online, in craft stores, or even create your own.
- Transfer Tools: Use carbon paper, a stylus, or a pin to transfer the template onto the pumpkin.
- Pencil or Marker: For tracing the template.
- Safety Glasses: Protect your eyes from flying debris.
- Gloves: Optional, but recommended for a cleaner experience.
- Pumpkin Carving Tools: A small scoop or scraper to remove the pumpkin seeds and pulp.
- Light Source: Battery-operated tea lights or LED lights are safer than candles.
Finding the Perfect Drilled Pumpkin Templates
The internet is a treasure trove of drilled pumpkin templates. Here are some resources to explore:
- Etsy: A great place to find unique and artistic templates from independent designers.
- Pinterest: A visual search engine where you can discover a wide range of free and paid templates.
- Craft Blogs: Many crafting blogs offer free downloadable templates.
- Google Images: Search for “drilled pumpkin templates” to find a plethora of options.
- Create Your Own: If you’re feeling ambitious, design your own template using graphic design software or even by hand.
When choosing a template, consider your skill level and the time you’re willing to invest. Start with simpler designs if you’re a beginner and gradually work your way up to more complex patterns.
Step-by-Step Guide to Using Drilled Pumpkin Templates
Here’s a detailed guide on how to bring your drilled pumpkin templates to life:
- Prepare Your Pumpkin: Cut a hole in the back of the pumpkin (not the top, as with traditional carving). This will allow you to easily remove the seeds and pulp. Scrape the inside walls until they are relatively thin.
- Transfer the Template: Attach the template to the pumpkin using tape. Use carbon paper and a stylus, or a pin, to carefully transfer the design onto the pumpkin’s surface. Ensure the template is securely attached to prevent it from shifting during the transfer process.
- Trace the Design: Go over the transferred design with a pencil or marker to make it more visible.
- Start Drilling: Put on your safety glasses. Select a drill bit size that corresponds to the template’s instructions (or your desired effect). Begin drilling each hole, holding the drill perpendicular to the pumpkin’s surface. Apply gentle pressure and let the drill do the work. Avoid forcing the drill, as this could crack the pumpkin.
- Vary Drill Bit Sizes: Use different drill bit sizes to create depth and dimension in your design. Smaller bits will produce subtle points of light, while larger bits will create brighter, more pronounced holes.
- Clean Up: Once you’ve finished drilling, wipe away any pumpkin shavings from the surface.
- Add Lighting: Place battery-operated tea lights or LED lights inside the pumpkin. Arrange them to maximize the illumination of your drilled design.
- Display Your Masterpiece: Find the perfect spot to showcase your stunning drilled pumpkin.
Tips for Success with Drilled Pumpkin Templates
Here are some tips to help you achieve the best results with drilled pumpkin templates:
- Start Small: If you’re new to drilling pumpkins, start with a simple template and smaller drill bits.
- Use Sharp Drill Bits: Dull drill bits can make the process more difficult and increase the risk of cracking the pumpkin.
- Go Slow: Don’t rush the drilling process. Take your time and focus on accuracy.
- Support the Pumpkin: Place the pumpkin on a stable surface while drilling to prevent it from rolling.
- Consider the Lighting: The type of lighting you use can dramatically affect the appearance of your drilled pumpkin. Experiment with different colors and intensities.
- Seal the Edges: Applying petroleum jelly or a sealant around the drilled holes can help prevent the pumpkin from drying out and cracking.
- Practice Makes Perfect: Don’t be discouraged if your first attempt isn’t perfect. The more you practice, the better you’ll become.
Creative Ideas for Drilled Pumpkin Templates
The possibilities are endless when it comes to drilled pumpkin templates. Here are a few ideas to spark your creativity:
- Constellations: Create a celestial masterpiece by drilling the patterns of your favorite constellations.
- Geometric Designs: Opt for modern and abstract designs using geometric shapes.
- Floral Patterns: Drill delicate floral patterns for a touch of elegance.
- Animal Silhouettes: Create silhouettes of your favorite animals using different sized drill bits.
- Monograms: Personalize your pumpkin with a monogram or initial.
- Halloween Icons: Classic Halloween icons like bats, ghosts, and spiders can be adapted for drilled designs.
Maintaining Your Drilled Pumpkin
To extend the life of your drilled pumpkin, consider these tips:
- Keep it Cool: Store your pumpkin in a cool, dry place when it’s not on display.
- Hydrate: Lightly mist the inside of the pumpkin with water every few days to keep it hydrated.
- Avoid Direct Sunlight: Direct sunlight can cause the pumpkin to dry out and rot faster.
- Apply a Preservative: Consider using a commercial pumpkin preservative to help prevent mold and decay.
Troubleshooting Common Issues
Even with the best planning, you might encounter some challenges. Here’s how to address common problems:
- Cracking: If the pumpkin cracks while drilling, stop immediately. You can try to repair small cracks with glue or tape.
- Drill Bit Slipping: If the drill bit slips, try using a center punch to create a small indentation before drilling.
- Template Shifting: Ensure the template is securely attached to the pumpkin with tape.
- Uneven Holes: Practice consistent pressure and angle while drilling to achieve uniform holes.
Conclusion: Embrace the Art of Drilled Pumpkins
Drilled pumpkin templates offer a fantastic way to elevate your Halloween decorations and unleash your inner artist. With the right tools, a little patience, and a dash of creativity, you can create stunning illuminated masterpieces that will be the envy of the neighborhood. So, this Halloween, ditch the traditional carving and embrace the intricate beauty of drilled pumpkins. Happy drilling!
[See also: Pumpkin Carving Safety Tips]
[See also: Best Battery Operated Lights for Pumpkins]
[See also: Creative Halloween Decoration Ideas]

