The Ultimate Guide to Silicone Adhesive Remover: Methods, Tips, and Best Products
Silicone adhesives are incredibly versatile, providing strong and durable bonds in a wide range of applications, from construction and automotive to DIY projects and household repairs. However, their robust nature can also make them notoriously difficult to remove. Whether you’re dealing with stubborn sealant residue on your bathroom tiles, excess adhesive on your car’s windshield, or a sticky mess after a home improvement project, understanding how to effectively use a silicone adhesive remover is essential. This comprehensive guide will walk you through various methods, offer practical tips, and recommend some of the best products available to help you tackle even the most challenging silicone removal tasks.
Understanding Silicone Adhesives and Why Removal is Tricky
Silicone adhesives are polymers made up of repeating units of siloxane. Their chemical structure gives them several desirable properties, including high temperature resistance, flexibility, and water resistance. These qualities make them ideal for sealing joints, bonding materials, and protecting surfaces from environmental factors. However, the very properties that make them so effective also make them difficult to remove. Silicone adhesives form strong bonds with a variety of surfaces, and their flexible nature allows them to resist cracking and peeling.
Traditional solvents often struggle to dissolve silicone adhesives because of their unique chemical composition. Mechanical methods, such as scraping, can be effective but risk damaging the underlying surface. Therefore, specialized silicone adhesive removers are often necessary to soften and break down the adhesive, making it easier to remove without causing damage.
Methods for Removing Silicone Adhesive
There are several approaches you can take to remove silicone adhesive, depending on the type of surface, the age of the adhesive, and the tools available. Here are some of the most common and effective methods:
Mechanical Removal
Mechanical removal involves physically scraping or peeling away the silicone adhesive. This method is best suited for relatively new or soft adhesives and surfaces that are resistant to scratching.
- Tools: Use a plastic scraper, putty knife, razor blade (with caution), or a specialized silicone removal tool.
- Technique: Gently slide the tool under the edge of the adhesive and try to lift it away from the surface. Avoid applying excessive force, which can damage the underlying material. For stubborn areas, try softening the adhesive with heat or a solvent before scraping.
- Pros: Simple, requires minimal equipment, can be effective for small areas.
- Cons: Can be time-consuming, risks damaging the surface, not suitable for all types of silicone adhesive.
Heat Application
Applying heat can soften silicone adhesive, making it easier to peel or scrape away. This method is particularly useful for older, hardened adhesives.
- Tools: Use a heat gun, hair dryer, or steamer.
- Technique: Apply heat evenly to the adhesive for a few minutes, being careful not to overheat the surface. Once the adhesive is softened, use a scraper or putty knife to remove it.
- Pros: Effective for softening hardened adhesives, relatively safe for most surfaces.
- Cons: Requires a heat source, can take some time, may not be effective for all types of silicone adhesive.
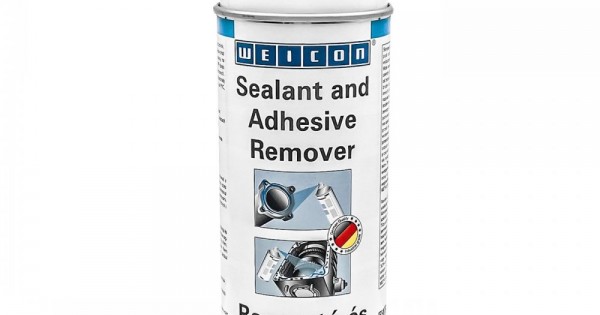
Solvent-Based Removal
Solvent-based silicone adhesive removers contain chemicals that dissolve or soften the adhesive, making it easier to remove. These products are available in various forms, including sprays, gels, and liquids.
- Tools: Use a solvent-based silicone adhesive remover, gloves, safety glasses, a scraper, and a clean cloth.
- Technique: Apply the silicone adhesive remover to the adhesive, following the manufacturer’s instructions. Allow the solvent to penetrate the adhesive for the recommended time, then scrape or wipe away the softened residue. Repeat as necessary.
- Pros: Highly effective for removing stubborn silicone adhesive, can be used on a variety of surfaces.
- Cons: Requires proper ventilation, may contain harsh chemicals, can be expensive.
Natural or Homemade Solutions
For those seeking a more environmentally friendly or cost-effective solution, several natural or homemade remedies can be used to remove silicone adhesive. While these methods may not be as effective as commercial silicone adhesive removers, they are often safer and more readily available.
- Vinegar: Acetic acid in vinegar can help break down silicone adhesive. Apply vinegar to the adhesive, let it sit for several hours, and then scrape it away.
- Baking Soda Paste: Mix baking soda with water to form a paste, apply it to the adhesive, and let it dry. The abrasive nature of baking soda can help loosen the adhesive.
- Citrus-Based Cleaners: Citrus oils contain solvents that can dissolve silicone adhesive. Apply a citrus-based cleaner to the adhesive, let it sit for a few hours, and then scrape it away.
- Pros: Environmentally friendly, cost-effective, readily available.
- Cons: May not be as effective as commercial removers, can take longer, may require multiple applications.
Choosing the Right Silicone Adhesive Remover Product
When selecting a commercial silicone adhesive remover, consider the following factors:
- Surface Compatibility: Ensure the product is safe for the surface you’re working with. Some removers can damage certain materials, such as plastic or painted surfaces.
- Type of Adhesive: Different removers are formulated for different types of silicone adhesive. Choose a product that is specifically designed for the type of adhesive you’re trying to remove.
- Ease of Use: Consider the application method and the amount of time required for the remover to work. Some products are easier to use than others.
- Safety: Always wear gloves and safety glasses when using silicone adhesive removers. Ensure proper ventilation to avoid inhaling harmful fumes.
- Reviews and Ratings: Check online reviews and ratings to get an idea of the product’s effectiveness and user satisfaction.
Here are a few highly-rated silicone adhesive removers available on the market:
- Goo Gone Adhesive Remover: A popular choice for removing a wide range of adhesives, including silicone. It’s safe for most surfaces and easy to use.
- Motsenbocker’s Lift Off 4 Adhesive, Caulk, and Sealant Remover: Specifically designed for removing caulk and sealant, including silicone. It’s biodegradable and low-VOC.
- 3M Adhesive Remover: A powerful solvent-based remover that quickly dissolves silicone adhesive. It’s best suited for industrial applications and requires proper ventilation.
Step-by-Step Guide to Using Silicone Adhesive Remover
Follow these steps for effective silicone adhesive removal:
- Prepare the Area: Clean the area around the adhesive to remove any loose debris or dirt.
- Apply the Remover: Apply the silicone adhesive remover to the adhesive, following the manufacturer’s instructions. Use a brush or cloth to apply the remover evenly.
- Allow Penetration: Let the remover sit for the recommended time, allowing it to penetrate and soften the adhesive.
- Scrape or Wipe Away: Use a scraper or putty knife to gently remove the softened adhesive. For stubborn areas, repeat the application and scraping process.
- Clean the Surface: Once the adhesive is removed, clean the surface with a mild detergent and water to remove any remaining residue.
- Inspect and Repeat: Inspect the area and repeat the process if necessary to remove any remaining traces of silicone adhesive.
Tips and Tricks for Effective Silicone Adhesive Removal
- Test in an Inconspicuous Area: Before applying any silicone adhesive remover to a large area, test it in an inconspicuous spot to ensure it doesn’t damage the surface.
- Use Proper Ventilation: When using solvent-based removers, work in a well-ventilated area to avoid inhaling harmful fumes.
- Apply Heat: If the adhesive is particularly stubborn, try applying heat with a heat gun or hair dryer to soften it before applying the remover.
- Use a Plastic Scraper: Plastic scrapers are less likely to damage surfaces than metal scrapers.
- Be Patient: Silicone adhesive removal can be a time-consuming process. Be patient and avoid applying excessive force, which can damage the surface.
- Layer the Remover: For thick layers of silicone, apply the silicone adhesive remover in multiple layers, allowing each layer to penetrate before applying the next.
Safety Precautions When Using Silicone Adhesive Remover
Using silicone adhesive removers involves handling chemicals that can be harmful if not used properly. Here are some essential safety precautions:
- Wear Protective Gear: Always wear gloves and safety glasses to protect your skin and eyes from contact with the remover.
- Ensure Proper Ventilation: Work in a well-ventilated area to avoid inhaling harmful fumes. If necessary, use a respirator.
- Avoid Contact with Skin and Eyes: If the remover comes into contact with your skin or eyes, rinse immediately with plenty of water. Seek medical attention if irritation persists.
- Keep Away from Children and Pets: Store silicone adhesive removers in a safe place, out of reach of children and pets.
- Dispose of Properly: Dispose of used removers and rags according to local regulations.
Common Mistakes to Avoid
- Using the Wrong Remover: Using a remover that is not designed for silicone adhesive can be ineffective or even damage the surface.
- Applying Excessive Force: Applying too much force when scraping can damage the surface.
- Ignoring Safety Precautions: Failing to wear protective gear or ensure proper ventilation can lead to health problems.
- Not Allowing Enough Penetration Time: Not allowing the remover enough time to penetrate the adhesive can make it difficult to remove.
- Using Metal Tools on Sensitive Surfaces: Using metal scrapers or knives on sensitive surfaces can cause scratches and damage.
Conclusion
Removing silicone adhesive can be a challenging task, but with the right methods, tools, and silicone adhesive remover, it’s entirely manageable. Whether you choose a mechanical approach, heat application, solvent-based remover, or a natural solution, understanding the properties of silicone adhesive and following the proper safety precautions are essential for achieving successful results. By following the tips and guidelines outlined in this guide, you can effectively remove silicone adhesive without damaging the underlying surface, ensuring a clean and professional finish. Remember to always prioritize safety and choose the silicone adhesive remover that best suits your needs and the specific requirements of your project. [See also: Best Adhesive Removers for Plastic] [See also: How to Remove Caulk from Bathtub] [See also: Guide to Removing Super Glue]
