How to Shingle a Roof Using Architectural Shingles: A Comprehensive Guide
Replacing or installing a new roof is a significant undertaking, and choosing the right materials and techniques is crucial for longevity and aesthetic appeal. Architectural shingles, also known as dimensional or laminated shingles, have become increasingly popular due to their durability and attractive appearance. This guide provides a comprehensive overview of how to shingle a roof using architectural shingles, covering everything from preparation to installation.
Understanding Architectural Shingles
Architectural shingles are a type of asphalt shingle that offers a more textured and dimensional look compared to traditional three-tab shingles. They are typically heavier and more durable, providing better resistance to wind and weather. Their layered construction also contributes to a longer lifespan, often ranging from 30 to 50 years. Understanding the benefits and characteristics of architectural shingles is the first step in ensuring a successful roofing project.
Benefits of Architectural Shingles
- Durability: Architectural shingles are thicker and heavier, offering superior protection against wind, rain, and hail.
- Aesthetic Appeal: They provide a more dimensional and visually appealing look compared to traditional shingles, mimicking the appearance of wood shake or slate.
- Longevity: With proper installation, architectural shingles can last for 30 to 50 years, making them a worthwhile investment.
- Wind Resistance: Many architectural shingles are designed to withstand high winds, providing added protection in storm-prone areas.
- Increased Home Value: A new roof with architectural shingles can enhance your home’s curb appeal and increase its resale value.
Preparing for the Roofing Project
Before you begin shingling a roof, thorough preparation is essential. This includes gathering the necessary tools and materials, inspecting the existing roof structure, and ensuring a safe working environment. Failing to properly prepare can lead to costly mistakes and delays.
Tools and Materials Needed
- Architectural Shingles: Calculate the square footage of your roof and purchase enough shingles to cover the area, plus an extra 10% for waste.
- Underlayment: This provides an extra layer of protection against moisture and helps the shingles adhere properly.
- Drip Edge: Installed along the edges of the roof to prevent water from running behind the fascia.
- Roofing Nails: Use galvanized roofing nails specifically designed for shingle installation.
- Hammer or Nail Gun: A hammer or pneumatic nail gun will be needed to secure the shingles.
- Utility Knife: For cutting shingles and underlayment.
- Measuring Tape: To accurately measure and align the shingles.
- Chalk Line: To create straight lines for shingle alignment.
- Safety Gear: Including a hard hat, safety glasses, and a fall protection harness.
Inspecting the Existing Roof
Carefully inspect the existing roof for signs of damage, such as rot, mold, or sagging. Replace any damaged sheathing before installing the new shingles. This ensures a solid foundation for the new roof and prevents future problems. Look for water stains in the attic, which can indicate leaks.
Safety Precautions
Roofing can be dangerous, so it’s crucial to take safety precautions. Wear appropriate safety gear, including a hard hat, safety glasses, and a fall protection harness. Ensure the ladder is securely positioned and avoid working on the roof during wet or windy conditions. Consider hiring a professional if you are not comfortable working at heights.
Step-by-Step Guide to Shingling a Roof with Architectural Shingles
Now that you have prepared your tools, materials, and roof, here are the steps for how to shingle a roof using architectural shingles:
Step 1: Remove Existing Shingles
If you are replacing an existing roof, start by removing the old shingles. Use a roofing shovel or pry bar to lift the shingles and remove the nails. Be sure to remove all nails and debris to create a clean surface for the new shingles. Dispose of the old shingles properly.
Step 2: Install Drip Edge
Install the drip edge along the eaves and rakes of the roof. The drip edge should overhang the fascia board and direct water away from the roof structure. Secure the drip edge with roofing nails, spacing them about 12 inches apart.
Step 3: Apply Underlayment
Roll out the underlayment, starting at the bottom edge of the roof and working your way up. Overlap each course of underlayment by at least 6 inches. Secure the underlayment with roofing nails, spacing them about 12 inches apart. Ensure the underlayment is smooth and free of wrinkles.
Step 4: Install Starter Course
The starter course is a row of shingles installed along the eaves to provide a solid base for the first course of architectural shingles. You can use a special starter shingle or cut a regular shingle in half. Install the starter course with the adhesive strip facing up, and secure it with roofing nails.
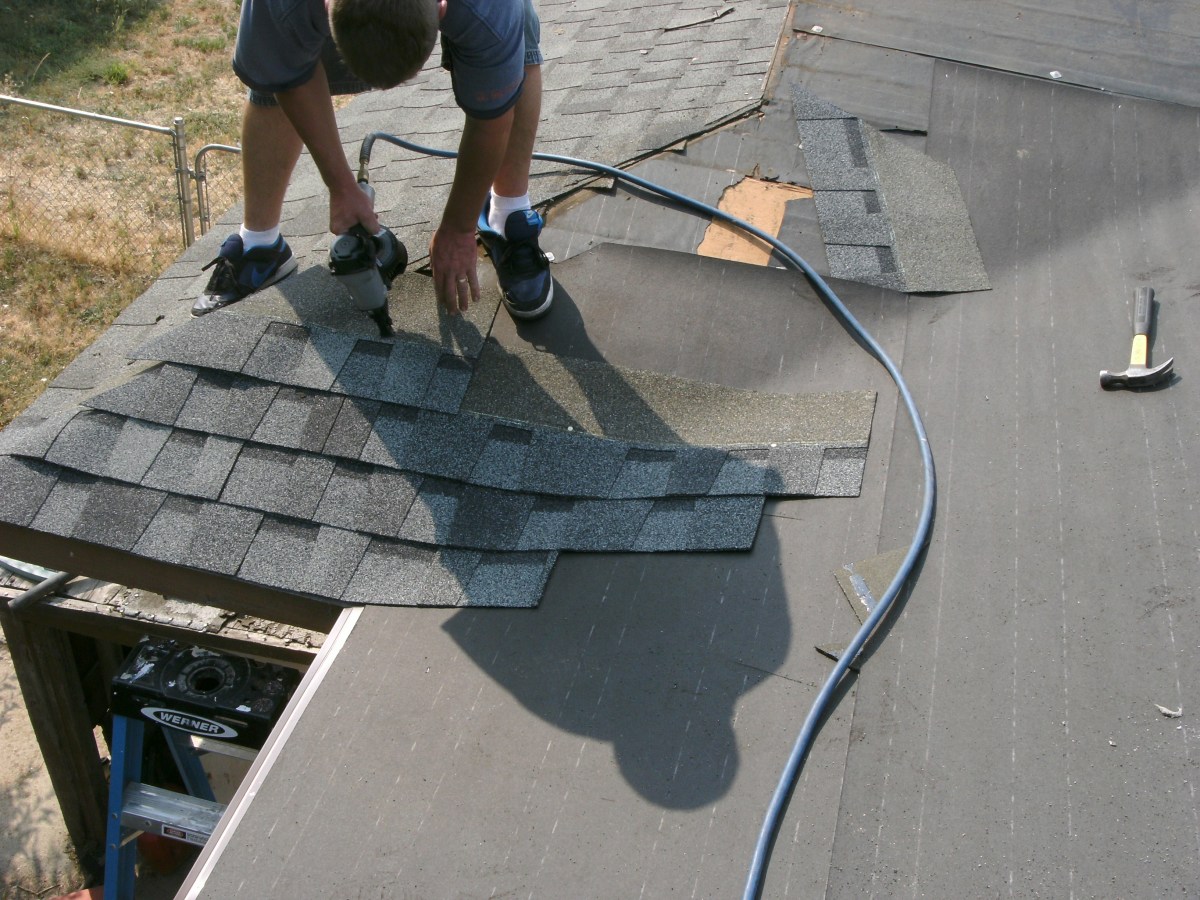
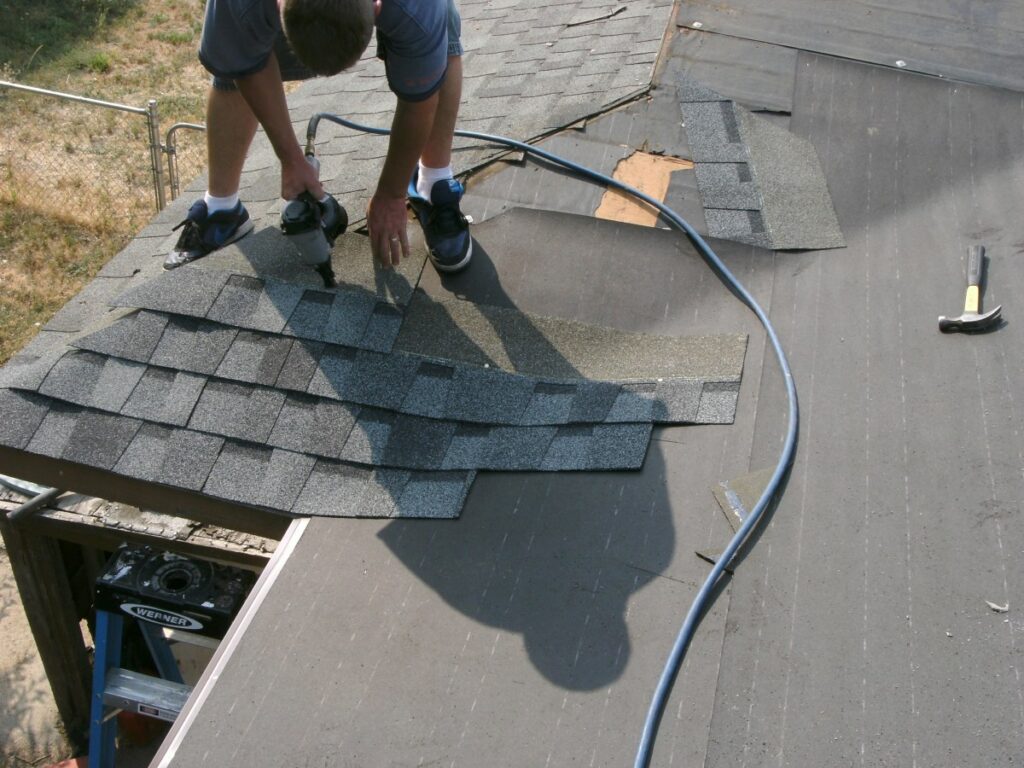
Step 5: Install the First Course of Architectural Shingles
Begin installing the first course of architectural shingles directly above the starter course. Align the bottom edge of the shingles with the bottom edge of the starter course. Secure each shingle with roofing nails, using the manufacturer’s recommended nailing pattern. Typically, this involves placing four to six nails per shingle, positioned just below the adhesive strip.
Step 6: Continue Installing Subsequent Courses
Continue installing subsequent courses of shingles, overlapping each course according to the manufacturer’s instructions. This overlap, also known as the exposure, is crucial for creating a watertight seal. Use a chalk line to ensure each course is straight and aligned. Stagger the joints between shingles to prevent water from seeping through.
Step 7: Shingle the Ridges and Hips
Once you have shingled the main roof surface, it’s time to shingle the ridges and hips. These are the angled edges where two roof planes meet. Use special ridge cap shingles or cut regular shingles to fit. Overlap each ridge cap shingle and secure it with roofing nails. Ensure the nails are long enough to penetrate through the ridge and into the underlying sheathing.
Step 8: Seal Around Vents and Chimneys
Properly sealing around vents, chimneys, and other roof penetrations is essential to prevent leaks. Use flashing to create a watertight seal around these areas. The flashing should be integrated with the shingles, overlapping each other to direct water away from the penetration. Apply roofing sealant to any gaps or seams.
Tips for Working with Architectural Shingles
Working with architectural shingles requires attention to detail and adherence to best practices. Here are some tips to ensure a successful installation:
- Follow Manufacturer’s Instructions: Always refer to the manufacturer’s instructions for specific installation guidelines, nailing patterns, and overlap requirements.
- Use Proper Nailing Techniques: Drive the roofing nails straight and flush with the shingle surface. Overdriving or underdriving the nails can compromise the shingles’ ability to seal properly.
- Work in Moderate Weather: Avoid installing shingles during extreme temperatures, as this can affect their flexibility and adhesion. Ideal conditions are mild and dry.
- Store Shingles Properly: Store the shingles in a cool, dry place, away from direct sunlight. This prevents them from becoming brittle or damaged.
- Inspect Your Work Regularly: Periodically inspect your work to ensure the shingles are properly aligned and secured. Correct any mistakes promptly to prevent future problems.
Maintaining Your New Architectural Shingle Roof
Proper maintenance can extend the life of your architectural shingle roof and prevent costly repairs. Here are some tips for maintaining your new roof:
- Regular Inspections: Inspect your roof at least twice a year, preferably in the spring and fall. Look for damaged or missing shingles, cracked sealant, and any signs of leaks.
- Clean Debris: Remove leaves, branches, and other debris from the roof regularly. This prevents moisture buildup and mold growth.
- Trim Overhanging Branches: Trim any overhanging branches that could damage the shingles.
- Clean Gutters: Keep your gutters clean to ensure proper water drainage. Clogged gutters can cause water to back up onto the roof and lead to leaks.
- Address Problems Promptly: Repair any damaged shingles or leaks as soon as possible to prevent further damage.
When to Hire a Professional Roofing Contractor
While it’s possible to shingle a roof using architectural shingles yourself, it’s not always the best option. Roofing can be dangerous and requires specialized skills and knowledge. Consider hiring a professional roofing contractor if:
- You are not comfortable working at heights.
- You lack the necessary tools and equipment.
- You are unsure about any aspect of the installation process.
- Your roof is complex or has multiple angles and pitches.
- You want to ensure the job is done correctly and to code.
A professional roofing contractor can provide a warranty on their work and ensure your roof is installed properly, giving you peace of mind.
Conclusion
Shingling a roof using architectural shingles is a rewarding project that can enhance the beauty and value of your home. By following these steps and taking the necessary precautions, you can achieve a durable and attractive roof that will protect your home for years to come. Remember to prioritize safety, follow the manufacturer’s instructions, and maintain your roof regularly to ensure its longevity. Whether you choose to tackle the project yourself or hire a professional, understanding the process is key to a successful outcome. [See also: Choosing the Right Roofing Material] Applying architectural shingles correctly will protect your home for years to come. You’ll want to ensure you’re using the proper safety equipment when installing architectural shingles. Many homeowners are opting for architectural shingles because of their longevity. With proper care, architectural shingles can last for decades. The key to a long-lasting roof is in the installation of the architectural shingles. Don’t cut corners when you shingle a roof. Architectural shingles are a great investment for your home. Make sure you understand how to shingle a roof using architectural shingles before starting the project. The beauty of architectural shingles is undeniable. One of the most important things is how to shingle a roof using architectural shingles correctly. If you are unsure of how to shingle a roof using architectural shingles, contact a professional roofer. These tips will help you shingle a roof. Knowing how to shingle a roof using architectural shingles can save you money in the long run.
