How to Remove Emblem Glue from Your Car: A Comprehensive Guide
Removing emblems from your car can be a great way to customize its appearance, whether you’re aiming for a cleaner look, replacing damaged emblems, or preparing for a fresh paint job. However, the adhesive used to secure these emblems can leave behind a stubborn residue. This guide provides a step-by-step approach to safely and effectively remove emblem glue from your car without damaging the paintwork. We’ll explore various methods, from using household items to specialized automotive products, ensuring you achieve a professional finish.
Understanding Emblem Glue
Before diving into the removal process, it’s crucial to understand the nature of emblem glue. Automakers typically use strong, weather-resistant adhesives designed to withstand extreme temperatures, vibrations, and environmental elements. These adhesives are often acrylic-based or double-sided tapes, formulated for long-term bonding. Consequently, simply peeling off an emblem usually leaves a significant amount of sticky residue behind.
Tools and Materials You’ll Need
Gathering the necessary tools and materials beforehand will streamline the removal process. Here’s a comprehensive list:
- Heat Gun or Hair Dryer: To soften the adhesive.
- Plastic Razor Blades or Trim Removal Tools: To gently lift the emblem and scrape away glue. Avoid metal tools, which can scratch the paint.
- Adhesive Remover: Specifically designed for automotive use (e.g., Goo Gone Automotive, 3M Adhesive Remover).
- Microfiber Towels: For wiping and cleaning.
- Detailing Clay Bar: To remove stubborn residue without scratching.
- Wax and Grease Remover: To clean the surface before applying wax or sealant.
- Wax or Sealant: To protect the newly cleaned area.
- Gloves: To protect your hands from chemicals.
- Masking Tape: To protect surrounding paint.
Step-by-Step Guide to Removing Emblem Glue
Step 1: Preparing the Area
Start by thoroughly cleaning the area around the emblem with soap and water. This removes any dirt or debris that could scratch the paint during the removal process. Dry the area completely with a microfiber towel. Apply masking tape around the emblem to protect the surrounding paint from accidental scratches or damage.
Step 2: Softening the Adhesive
Use a heat gun or hair dryer to gently warm the emblem and the surrounding adhesive. Hold the heat source a few inches away from the surface and move it back and forth to avoid overheating the paint. The goal is to soften the adhesive, making it easier to peel away. Be patient; overheating can damage the paint. Generally, a minute or two of gentle heating is sufficient. This step is crucial for effectively remove emblem glue from your car.
Step 3: Removing the Emblem
Carefully use a plastic razor blade or trim removal tool to gently pry the emblem away from the car’s surface. Work slowly and methodically, applying gentle pressure. If the emblem is particularly stubborn, apply more heat. Avoid forcing the emblem, as this could damage the paint. Once you’ve removed the emblem, you’ll likely be left with a layer of adhesive residue.
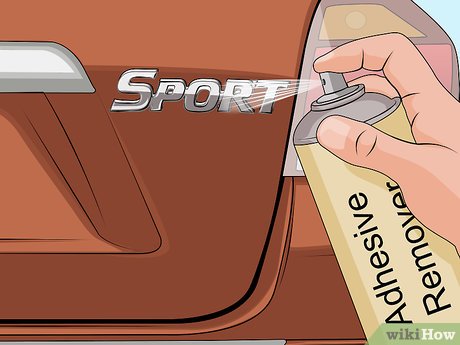
Step 4: Applying Adhesive Remover
Apply a generous amount of automotive adhesive remover to the remaining glue residue. Let it sit for the recommended time specified on the product label, typically a few minutes. This allows the remover to penetrate and dissolve the adhesive. Ensure the product is specifically designed for automotive use to avoid damaging the paint. Some popular options include Goo Gone Automotive and 3M Adhesive Remover.
Step 5: Scraping Away the Residue
After the adhesive remover has had time to work, use a plastic razor blade or trim removal tool to gently scrape away the softened glue residue. Work in small sections, applying gentle pressure. If the residue is still difficult to remove, apply more adhesive remover and let it sit for a longer period. Continue scraping until you’ve removed as much residue as possible. Remember to be patient and avoid using excessive force, which could scratch the paint.
Step 6: Using a Detailing Clay Bar
For any stubborn residue that remains after scraping, use a detailing clay bar. First, knead the clay bar to soften it. Then, spray the area with a clay bar lubricant or detailing spray. Gently rub the clay bar over the residue in a back-and-forth motion. The clay bar will lift the remaining adhesive without scratching the paint. Periodically fold and knead the clay bar to expose a clean surface. This is an effective way to remove emblem glue from your car without causing damage.
Step 7: Cleaning the Surface
Once you’ve removed all the adhesive residue, clean the area with a wax and grease remover. This will remove any remaining adhesive remover or clay bar lubricant, ensuring a clean surface for the final step. Wipe the area dry with a clean microfiber towel.
Step 8: Protecting the Paint
Finally, apply a layer of wax or sealant to the cleaned area to protect the paint and restore its shine. This will also help prevent future dirt and debris from sticking to the surface. Follow the instructions on the wax or sealant product for best results. Applying a protective layer is essential after you remove emblem glue from your car.
Alternative Methods for Removing Emblem Glue
While the above method is generally effective, here are some alternative approaches you can try:
- WD-40: While not specifically designed as an adhesive remover, WD-40 can sometimes dissolve glue residue. Spray it on the affected area, let it sit for a few minutes, and then wipe it away with a microfiber towel.
- Isopropyl Alcohol: Isopropyl alcohol can also help dissolve adhesive. Apply it to a microfiber towel and gently rub the residue. Be cautious, as alcohol can dry out the paint, so use it sparingly and apply wax afterward.
- Eraser Wheel: An eraser wheel, also known as a caramel wheel, is a specialized tool designed to remove adhesive residue from cars. It attaches to a drill and uses friction to gently remove the glue. However, it requires careful use to avoid damaging the paint.
Common Mistakes to Avoid
To ensure a successful and damage-free emblem glue removal, avoid these common mistakes:
- Using Metal Tools: Metal tools can easily scratch the paint. Always use plastic razor blades or trim removal tools.
- Applying Excessive Heat: Overheating the paint can cause it to blister or fade. Use a heat gun or hair dryer on a low setting and move it back and forth to avoid concentrating the heat in one area.
- Using Harsh Chemicals: Avoid using strong solvents or household cleaners that are not specifically designed for automotive use, as they can damage the paint.
- Rushing the Process: Patience is key. Rushing the process can lead to mistakes and potential damage. Work slowly and methodically, allowing the adhesive remover to do its job.
Preventing Future Adhesive Buildup
While removing emblem glue is a necessary task, you can take steps to minimize future buildup. When reattaching emblems, use high-quality automotive-grade adhesive tape. Ensure the surface is clean and dry before applying the tape. Regularly wash and wax your car to protect the paint and prevent adhesive from bonding too strongly.
Conclusion
Removing emblem glue from your car doesn’t have to be a daunting task. By following these steps and using the right tools and materials, you can safely and effectively remove emblem glue from your car without damaging the paintwork. Whether you’re a seasoned car enthusiast or a first-time DIYer, this guide provides the knowledge and techniques you need to achieve a professional finish. Remember to be patient, work carefully, and always prioritize the safety of your vehicle’s paint. With a little effort, you can restore your car’s appearance and achieve the clean, customized look you desire. This comprehensive guide helps you confidently remove emblem glue from your car and maintain its pristine condition. Remember to take your time and follow each step carefully to achieve the best results and avoid any potential damage to your vehicle’s paint. Understanding how to properly remove emblem glue from your car is a valuable skill for any car owner looking to customize or maintain their vehicle’s appearance.
[See also: Car Detailing Tips for Beginners]
[See also: How to Choose the Right Car Wax]
[See also: Automotive Paint Protection Film: Is It Worth It?]
