
How to Remove Auto Emblem Adhesive from Your Car: A Comprehensive Guide
Removing auto emblems can be a necessary task for various reasons, from aesthetic customization to collision repair. However, the adhesive used to secure these emblems can be incredibly stubborn, leaving behind unsightly residue. Knowing how to remove auto emblem adhesive from car surfaces effectively is crucial to avoid damaging the paintwork. This comprehensive guide will walk you through various methods and best practices to ensure a clean and professional finish.
Understanding Auto Emblem Adhesive
Before diving into the removal process, it’s essential to understand the nature of auto emblem adhesive. Automakers use strong, weather-resistant adhesives designed to withstand extreme temperatures, moisture, and vibrations. These adhesives are typically acrylic-based or epoxy-based, providing a robust bond between the emblem and the car’s body panel. This durability is what makes removing the adhesive a challenging task.
The type of adhesive used can vary between manufacturers and even between different emblem types on the same vehicle. Some emblems use double-sided adhesive tape, while others use a more permanent bonding agent. Identifying the type of adhesive can help you choose the most effective removal method.
Tools and Materials Needed
Having the right tools and materials on hand is essential for a successful adhesive removal. Here’s a list of items you may need:
- Heat Gun or Hair Dryer: To soften the adhesive.
- Plastic Razor Blades or Plastic Scrapers: To gently lift and scrape away the adhesive. Avoid metal blades, as they can scratch the paint.
- Adhesive Remover: Specifically designed for automotive use.
- Microfiber Towels: For cleaning and wiping surfaces.
- Isopropyl Alcohol: For removing any remaining residue and preparing the surface for polishing or waxing.
- Detailing Clay Bar: To remove stubborn residue without damaging the paint.
- Polishing Compound and Wax: To restore the paint’s shine after adhesive removal.
- Gloves: To protect your hands from chemicals and heat.
- Safety Glasses: To protect your eyes from splashes and debris.
Step-by-Step Guide to Removing Auto Emblem Adhesive
Step 1: Preparation
Begin by washing the area around the emblem with soap and water. This removes dirt and grime that could scratch the paint during the removal process. Dry the area thoroughly with a clean microfiber towel.
Step 2: Heat Application
Apply heat to the emblem and surrounding adhesive using a heat gun or hair dryer. Keep the heat source moving to avoid overheating the paint. The goal is to soften the adhesive, making it easier to peel away. Be cautious not to hold the heat gun too close to the paint, as excessive heat can damage the clear coat. A distance of 6-8 inches is generally recommended.
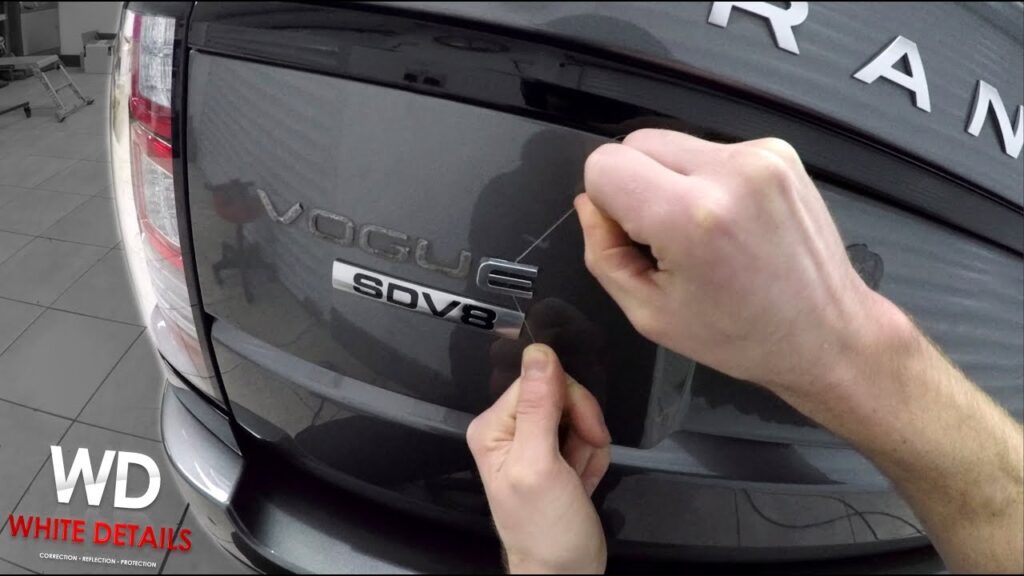
Step 3: Initial Removal
Once the adhesive is softened, use a plastic razor blade or scraper to gently lift an edge of the emblem. Work slowly and carefully, applying gentle pressure. If the emblem is resistant, apply more heat. Avoid using excessive force, as this could break the emblem or damage the paint. If you are working with an emblem that is particularly fragile, consider using dental floss or fishing line to saw through the adhesive behind the emblem.
Step 4: Adhesive Removal
After removing the emblem, you’ll likely be left with adhesive residue. This is where the real challenge begins. Start by applying heat to the remaining adhesive to soften it further. Then, use a plastic razor blade or scraper to gently scrape away the bulk of the adhesive. Work in small sections, applying heat as needed. Be patient and avoid rushing, as this can increase the risk of scratching the paint.
Step 5: Chemical Application
For stubborn adhesive residue, an automotive-specific adhesive remover is your best friend. Apply the remover to a clean microfiber towel and gently dab the affected area. Allow the remover to dwell for the recommended time (usually a few minutes) to dissolve the adhesive. Then, use the towel to wipe away the dissolved residue. Repeat this process as needed until the adhesive is completely removed. Always test the adhesive remover in an inconspicuous area first to ensure it doesn’t damage the paint. [See also: Best Automotive Adhesive Removers]
Step 6: Final Cleaning
Once you’ve removed the bulk of the adhesive, use isopropyl alcohol to clean the area thoroughly. This will remove any remaining residue and prepare the surface for polishing or waxing. Apply the alcohol to a clean microfiber towel and wipe the area in a circular motion. Inspect the surface carefully to ensure there are no traces of adhesive left.
Step 7: Clay Bar Treatment (Optional)
If there are still traces of adhesive residue after cleaning with isopropyl alcohol, a detailing clay bar can be used. Wet the area with a clay bar lubricant and gently rub the clay bar over the surface. The clay bar will pick up any remaining contaminants and leave the paint smooth and clean. Be sure to knead the clay bar frequently to expose a clean surface.
Step 8: Polishing and Waxing
After removing the adhesive, the paint may appear dull or swirled. To restore its shine, use a polishing compound and a microfiber polishing pad. Apply the compound to the pad and gently buff the area in a circular motion. This will remove any imperfections and restore the paint’s gloss. Finally, apply a coat of wax to protect the paint and enhance its shine. Use a clean microfiber towel to apply the wax evenly and then buff it to a high shine. This final step is crucial for protecting the area and giving it a showroom-worthy finish.
Alternative Methods for Removing Auto Emblem Adhesive
While the above method is generally effective, there are alternative approaches you can try:
- WD-40: WD-40 can be surprisingly effective at dissolving adhesive. Spray it on the residue, let it sit for a few minutes, and then wipe it away.
- Goo Gone: This citrus-based cleaner is designed to remove sticky substances. Apply it to the residue, let it sit, and then wipe it away.
- Eraser Wheel: An eraser wheel is a rubber disc that attaches to a drill. It spins and gently removes adhesive without damaging the paint. Use with caution and always test in an inconspicuous area first.
Common Mistakes to Avoid
Removing auto emblem adhesive can be tricky, and it’s easy to make mistakes. Here are some common pitfalls to avoid:
- Using Metal Tools: Metal scrapers and blades can easily scratch the paint. Always use plastic tools.
- Applying Too Much Heat: Excessive heat can damage the clear coat. Use a heat gun or hair dryer sparingly and keep it moving.
- Using Abrasive Cleaners: Avoid using harsh chemicals or abrasive cleaners, as they can dull the paint.
- Rushing the Process: Patience is key. Rushing can lead to mistakes and damage.
Preventing Future Adhesive Problems
Once you’ve successfully removed the adhesive, you can take steps to prevent future problems. When reattaching emblems or applying new adhesive, use high-quality automotive-grade adhesive that is designed to be easily removable. This will make future removals much easier. [See also: Choosing the Right Automotive Adhesive]
Conclusion
Knowing how to remove auto emblem adhesive from car surfaces is a valuable skill for any car owner. By following these steps and using the right tools and materials, you can safely and effectively remove adhesive residue without damaging your car’s paint. Remember to be patient, work carefully, and always test products in an inconspicuous area first. With a little effort, you can achieve a clean and professional finish.
Removing auto emblem adhesive doesn’t have to be a daunting task. With the right knowledge and tools, you can restore your car’s appearance and maintain its value. Whether you’re customizing your vehicle or repairing damage, mastering this skill will save you time and money in the long run. Understanding how to remove auto emblem adhesive from car correctly ensures a flawless finish every time.
The process of how to remove auto emblem adhesive from car involves several key steps, each requiring attention to detail. From preparing the area to the final polishing, every stage contributes to the overall success. By choosing the right adhesive remover and using gentle techniques, you can avoid costly damage and achieve professional-looking results. Remember to always prioritize safety and take your time to ensure a flawless outcome when learning how to remove auto emblem adhesive from car.
