How to Keep Pumpkins From Rotting After Carving: A Comprehensive Guide
Carving pumpkins is a beloved Halloween tradition, but the festive fun can quickly turn sour when your artistic creation starts to rot. Nobody wants a mushy, moldy jack-o’-lantern on their porch before Halloween even arrives. Understanding how to keep pumpkins from rotting after carving is essential for preserving your spooky masterpiece. This guide will provide you with proven methods and expert tips to extend the life of your carved pumpkins, ensuring they remain a captivating part of your Halloween decor for as long as possible.
Understanding Why Pumpkins Rot
Before diving into preservation techniques, it’s important to understand why pumpkins rot in the first place. Rotting is primarily caused by microorganisms like fungi and bacteria that thrive in the moist, sugary environment inside a pumpkin. Carving creates openings that allow these organisms to enter and start breaking down the pumpkin’s flesh. The process is accelerated by warm temperatures and high humidity, making it crucial to take preventive measures.
Factors Contributing to Pumpkin Rot:
- Microbial Activity: Fungi and bacteria are the main culprits.
- Moisture: Damp conditions promote microbial growth.
- Temperature: Warm temperatures accelerate decomposition.
- Wounds: Carving creates entry points for microorganisms.
Choosing the Right Pumpkin
The first step in preventing rot is selecting a healthy pumpkin. Look for pumpkins that are firm, free of blemishes, and have a sturdy stem. Avoid pumpkins with soft spots, bruises, or cuts, as these are signs of existing damage that will speed up the rotting process. A thick stem indicates that the pumpkin was properly nourished and harvested, contributing to its overall longevity.
Tips for Selecting a Healthy Pumpkin:
- Inspect for Blemishes: Avoid pumpkins with soft spots or bruises.
- Check the Stem: Choose pumpkins with a strong, sturdy stem.
- Firmness: The pumpkin should feel firm and heavy for its size.
- Color: Look for vibrant, even color without discoloration.
Preparation and Carving Techniques
How you prepare and carve your pumpkin significantly impacts its lifespan. Start by thoroughly cleaning the pumpkin’s exterior with a mild soap and water solution. This removes dirt and surface bacteria that can contribute to rot. When carving, use clean tools to minimize the introduction of harmful microorganisms. Consider using carving kits specifically designed for pumpkins, as they often include tools that are easier to sanitize.
Best Practices for Carving Pumpkins:
- Clean the Exterior: Wash the pumpkin with soap and water.
- Use Clean Tools: Sanitize carving tools before use.
- Remove All Pulp: Scrape the inside thoroughly to eliminate moisture and food for bacteria.
- Consider a Template: Plan your design to minimize unnecessary cuts.
Preservation Methods: Keeping Pumpkins Fresh
Several methods can help preserve your carved pumpkins and extend their lifespan. These range from simple home remedies to commercial products designed specifically for pumpkin preservation.
Bleach Solution
A diluted bleach solution is a popular and effective way to kill surface mold and bacteria. Mix one tablespoon of bleach per gallon of water, and either spray the solution inside and outside the pumpkin or soak the entire pumpkin in the solution for about 30 minutes. Allow the pumpkin to air dry completely. Reapply the bleach solution every few days to maintain its protective effect. This is a cost-effective way to keep pumpkins from rotting after carving. [See also: Preventing Mold on Carved Pumpkins]
Petroleum Jelly
Applying a thin layer of petroleum jelly to the carved edges can help seal in moisture and prevent the pumpkin from drying out, which can lead to cracking and rotting. Petroleum jelly also acts as a barrier against microbial entry. Apply it carefully to all exposed surfaces, ensuring a thin, even coat.
Commercial Pumpkin Preservatives
Several commercial products are available that are specifically designed to preserve carved pumpkins. These products often contain fungicides and other ingredients that inhibit microbial growth. Follow the manufacturer’s instructions for application. While these products may be more expensive than home remedies, they can provide effective and long-lasting protection.
Vinegar Solution
Similar to bleach, vinegar is an effective disinfectant that can kill mold and bacteria. Mix equal parts vinegar and water, and spray the solution inside and outside the pumpkin. Vinegar is a milder alternative to bleach and can be used more frequently without damaging the pumpkin’s surface. This is another practical option for learning how to keep pumpkins from rotting after carving.
Silica Gel Packets
Place silica gel packets inside the pumpkin to absorb excess moisture. These packets help create a drier environment that is less conducive to microbial growth. Replace the packets regularly as they become saturated with moisture. This method is particularly useful for pumpkins displayed in humid environments.
Environmental Factors and Display
Where you display your carved pumpkin can significantly impact its lifespan. Avoid placing pumpkins in direct sunlight or warm areas, as heat accelerates the rotting process. Opt for a cool, shaded location. If possible, bring the pumpkin indoors at night to protect it from dew and frost. Consider elevating the pumpkin on a stand or platform to improve air circulation and prevent moisture from accumulating underneath.
Tips for Displaying Carved Pumpkins:
- Avoid Direct Sunlight: Display pumpkins in a shaded area.
- Cool Environment: Keep pumpkins in a cool location to slow down decomposition.
- Elevate the Pumpkin: Use a stand to improve air circulation.
- Bring Indoors at Night: Protect pumpkins from dew and frost.
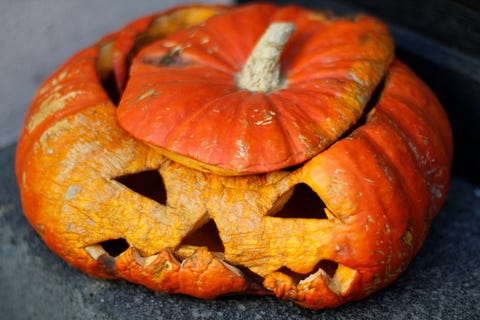
Addressing Mold Growth
Even with the best preservation efforts, mold may still appear on your carved pumpkin. If you notice mold growth, promptly address it to prevent further damage. Clean the affected areas with a bleach or vinegar solution. Use a soft brush to gently scrub away the mold. Allow the pumpkin to dry thoroughly before reapplying any preservative treatments. Regular inspection and maintenance are key to keeping your pumpkin looking its best.
Steps to Address Mold Growth:
- Identify Mold: Look for signs of mold, such as fuzzy patches or discoloration.
- Clean Affected Areas: Use a bleach or vinegar solution to kill the mold.
- Scrub Gently: Use a soft brush to remove the mold.
- Dry Thoroughly: Allow the pumpkin to air dry completely.
- Reapply Preservative: Reapply preservative treatments to protect the pumpkin.
Alternative Carving Methods
Traditional carving methods can be harsh on pumpkins, creating large openings that invite rot. Consider alternative carving techniques that minimize damage to the pumpkin’s flesh. For example, using stencils and etching tools can create intricate designs without cutting completely through the pumpkin. Drilling small holes instead of carving large shapes can also help extend the pumpkin’s lifespan. These methods are essential to understanding how to keep pumpkins from rotting after carving.
Alternative Carving Ideas:
- Stencils and Etching: Create designs without cutting through the pumpkin.
- Drilling Holes: Use small holes to create patterns.
- Painting: Decorate the pumpkin’s surface with paint instead of carving.
- Decoupage: Apply decorative paper or fabric to the pumpkin’s surface.
The Role of Hydration
While it might seem counterintuitive, keeping your carved pumpkin hydrated can actually help prevent it from rotting. Dehydration can cause the pumpkin’s flesh to shrink and crack, creating more entry points for microorganisms. Periodically misting the inside of the pumpkin with water can help maintain its moisture content. However, be careful not to overwater the pumpkin, as excessive moisture can also promote rot.
Tips for Hydrating Carved Pumpkins:
- Mist with Water: Periodically mist the inside of the pumpkin with water.
- Avoid Overwatering: Be careful not to saturate the pumpkin.
- Monitor Moisture Levels: Check the pumpkin regularly for signs of dehydration or excessive moisture.
Long-Term Pumpkin Preservation
If you want to preserve your carved pumpkin for an extended period, consider using a combination of preservation methods. Start by selecting a healthy pumpkin and cleaning it thoroughly. Use a bleach or vinegar solution to kill surface microorganisms. Apply petroleum jelly to the carved edges and place silica gel packets inside the pumpkin to absorb moisture. Display the pumpkin in a cool, shaded location and bring it indoors at night. Regularly inspect the pumpkin for signs of mold or dehydration and address any issues promptly. By following these steps, you can significantly extend the life of your carved pumpkin and enjoy its festive charm for weeks to come. Understanding how to keep pumpkins from rotting after carving is a multi-faceted approach, requiring diligence and the right techniques.
The Science Behind Pumpkin Preservation
The effectiveness of these preservation methods lies in their ability to disrupt the conditions that promote microbial growth. Bleach and vinegar act as disinfectants, killing bacteria and fungi. Petroleum jelly creates a barrier against moisture and microbial entry. Silica gel packets absorb excess moisture, creating a drier environment. By understanding the science behind these methods, you can tailor your preservation efforts to the specific environmental conditions in your area. This knowledge is critical to truly master how to keep pumpkins from rotting after carving.
Troubleshooting Common Issues
Even with the best efforts, you may encounter challenges in preserving your carved pumpkin. Here are some common issues and how to address them:
- Rapid Rotting: If your pumpkin is rotting quickly, check for underlying damage or inadequate preservation efforts. Reapply preservative treatments and adjust environmental conditions.
- Mold Growth: Address mold growth promptly with a bleach or vinegar solution. Ensure the pumpkin is drying thoroughly after treatment.
- Dehydration: Mist the pumpkin with water to maintain moisture content. Avoid overwatering.
- Insect Infestation: Use insect repellent to protect the pumpkin from pests.
Beyond Carving: Alternative Pumpkin Decorating Ideas
If you’re looking for ways to decorate pumpkins without carving, there are plenty of creative alternatives. Painting pumpkins is a popular option that allows for intricate designs without damaging the pumpkin’s flesh. You can also use decoupage techniques to apply decorative paper or fabric to the pumpkin’s surface. Another option is to use adhesive decorations, such as stickers, glitter, or sequins. These methods not only extend the pumpkin’s lifespan but also offer a wide range of creative possibilities.
The Final Verdict: Keeping Your Jack-o’-Lantern Alive
Mastering how to keep pumpkins from rotting after carving is an art and a science. By selecting a healthy pumpkin, using clean carving tools, applying preservative treatments, and controlling environmental factors, you can significantly extend the life of your jack-o’-lantern. Remember to regularly inspect your pumpkin for signs of rot or dehydration and address any issues promptly. With a little effort and attention, you can enjoy your spooky creation throughout the Halloween season.
