
How to Get Decals Off Your Car: A Comprehensive Guide
Removing decals from your car can seem like a daunting task. Whether you’re trying to refresh your vehicle’s appearance, remove outdated branding, or simply get rid of an unwanted sticker, knowing the right techniques is crucial. This guide provides a comprehensive overview of methods to safely and effectively get decals off your car without damaging the paint. We’ll cover everything from the tools you’ll need to step-by-step instructions, ensuring a smooth and successful removal process. Learning how to get decals off car the right way saves you time, money, and potential headaches.
Understanding the Challenge
Before diving into the removal process, it’s important to understand why decals can be so stubborn. Decals are designed to adhere strongly to surfaces, using a combination of adhesive and pressure. Over time, exposure to sunlight, temperature fluctuations, and environmental elements can further strengthen this bond, making removal more challenging. Attempting to simply peel off a decal often results in tearing, leaving behind unsightly residue or even damaging the underlying paint. Proper preparation and technique are key to get decals off your car successfully.
Essential Tools and Materials
Having the right tools on hand is essential for a smooth decal removal process. Here’s a list of items you’ll likely need:
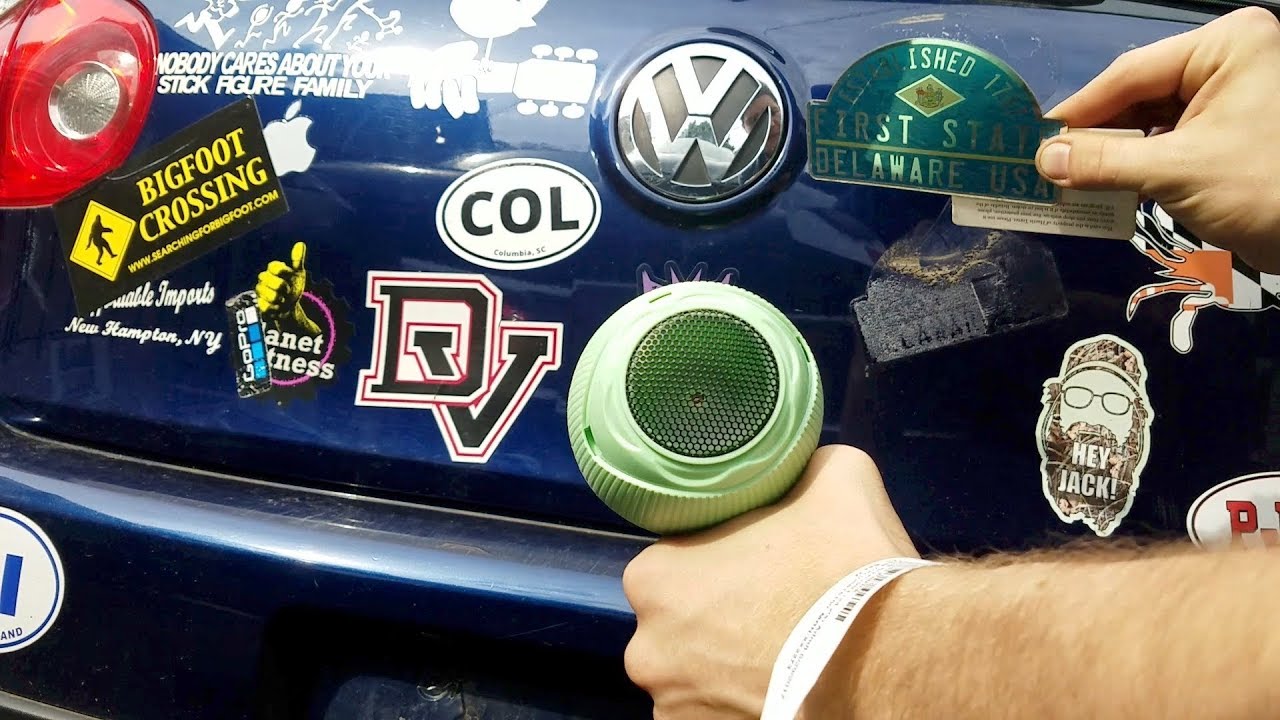
- Heat Gun or Hair Dryer: Heat softens the adhesive, making it easier to peel away the decal.
- Plastic Razor Blade or Scraper: A plastic blade minimizes the risk of scratching the paint.
- Adhesive Remover: Products like Goo Gone or WD-40 can help dissolve stubborn adhesive residue.
- Microfiber Cloths: For cleaning and applying adhesive remover.
- Spray Bottle with Soapy Water: For lubricating the area and cleaning off residue.
- Gloves: To protect your hands from chemicals and heat.
- Detailing Clay (Optional): For removing any remaining stubborn residue.
- Car Wax or Polish (Optional): To restore the shine to the area after removal.
Gathering these tools before you start will streamline the process and help you get decals off car efficiently.
Step-by-Step Guide to Removing Decals
Step 1: Preparation
Begin by washing the area around the decal with soap and water. This removes any dirt or debris that could scratch the paint during the removal process. Dry the area thoroughly with a microfiber cloth. Ensuring the area is clean is essential before you attempt to get decals off car.
Step 2: Applying Heat
Using a heat gun or hair dryer, apply heat to the decal in a sweeping motion. Hold the heat source a few inches away from the surface to avoid overheating the paint. The goal is to soften the adhesive without damaging the car’s finish. Focus on one section of the decal at a time, heating it for about 30-60 seconds. This makes it easier to get decals off car.
Step 3: Peeling the Decal
Once the decal is heated, use a plastic razor blade or scraper to gently lift an edge. Start at a corner and slowly peel the decal away from the surface. Continue applying heat as you peel, working in small sections. If the decal resists, apply more heat. Avoid pulling too hard, as this can cause the decal to tear and leave behind residue. Taking your time is crucial to get decals off car cleanly.
Step 4: Removing Adhesive Residue
After removing the decal, you’ll likely be left with some adhesive residue. Spray the affected area with an adhesive remover like Goo Gone or WD-40. Let it sit for a few minutes to dissolve the adhesive. Then, use a microfiber cloth to gently wipe away the residue. You may need to repeat this process several times to remove all traces of adhesive. [See also: Best Car Cleaning Products] For particularly stubborn residue, consider using detailing clay, following the manufacturer’s instructions. Removing all residue is key to a professional finish when you get decals off car.
Step 5: Cleaning and Polishing
Once the adhesive is removed, clean the area with soapy water to remove any remaining adhesive remover. Dry the area thoroughly with a clean microfiber cloth. Finally, apply a coat of car wax or polish to restore the shine to the paint. This will also help protect the area from future damage. Polishing is the final step to ensure a flawless finish after you get decals off car.
Alternative Methods for Removing Decals
While the heat gun and plastic razor blade method is generally effective, there are other approaches you can try:
- Steam: A steamer can be used to soften the adhesive, similar to a heat gun. Apply steam to the decal for a few seconds at a time, then try to peel it away.
- Eraser Wheel: An eraser wheel, also known as a caramel wheel, is a rubber disc that attaches to a drill. It’s designed to remove decals and adhesive without damaging the paint. Use it at a low speed and apply light pressure. [See also: Automotive Detailing Tips]
- Professional Detailing: If you’re uncomfortable removing the decal yourself, consider hiring a professional detailing service. They have the tools and expertise to remove decals safely and effectively.
Preventing Damage During Removal
One of the biggest concerns when removing decals is damaging the car’s paint. Here are some tips to minimize the risk:
- Avoid Metal Blades: Always use plastic razor blades or scrapers to prevent scratching the paint.
- Don’t Overheat: Applying too much heat can damage the paint. Use a low setting on your heat gun or hair dryer and keep it moving.
- Be Patient: Rushing the process can lead to mistakes. Take your time and work carefully.
- Test Adhesive Remover: Before applying adhesive remover to a large area, test it on an inconspicuous spot to ensure it doesn’t damage the paint.
By following these precautions, you can get decals off car without causing any harm.
When to Seek Professional Help
While many decal removal projects can be handled DIY, there are situations where professional help is recommended:
- Large or Complex Decals: Removing large or intricate decals can be challenging and time-consuming.
- Old or Brittle Decals: Older decals may be more brittle and prone to tearing, making removal difficult.
- Concerns About Paint Damage: If you’re worried about damaging the paint, it’s best to leave it to the professionals.
A professional detailer has the experience and equipment to get decals off car safely and efficiently, ensuring a flawless result.
Maintaining Your Car’s Appearance After Decal Removal
After successfully removing the decal, it’s important to maintain your car’s appearance to prevent future issues. Regular washing and waxing can help protect the paint and prevent new decals from adhering too strongly. Consider applying a ceramic coating for added protection. [See also: Car Detailing Tips and Tricks] Regular maintenance will keep your car looking its best after you get decals off car.
Conclusion
Removing decals from your car doesn’t have to be a stressful experience. By following the steps outlined in this guide and using the right tools, you can safely and effectively get decals off car without damaging the paint. Remember to be patient, take your time, and prioritize safety. Whether you’re removing a small sticker or a large graphic, these techniques will help you achieve a professional-looking result. Now you know how to get decals off car like a pro!
