Bleach a Pumpkin: A Comprehensive Guide to Cleaning and Preserving Your Fall Decor
As autumn leaves begin to fall and the air turns crisp, pumpkins emerge as a quintessential symbol of the season. From jack-o’-lanterns grinning on porches to elegant centerpieces adorning dining tables, pumpkins bring a touch of warmth and festivity to any space. However, these cheerful gourds are susceptible to mold and decay, threatening to cut their decorative lifespan short. One effective method to combat this is to bleach a pumpkin. This article provides a comprehensive guide on how to bleach a pumpkin, offering step-by-step instructions, safety precautions, and alternative methods for preserving your fall decorations.
Why Bleach a Pumpkin? Understanding the Benefits
Before diving into the process, it’s crucial to understand why bleach a pumpkin is a beneficial practice. Pumpkins, being organic matter, are naturally prone to decomposition. Mold, bacteria, and insects can accelerate this process, leading to a mushy, unsightly mess. Bleach a pumpkin offers several key advantages:
- Disinfection: Bleach acts as a powerful disinfectant, killing mold spores and bacteria that cause decay.
- Preservation: By eliminating these harmful microorganisms, bleaching significantly extends the life of your pumpkin.
- Cleaning: Bleach helps remove dirt, grime, and other surface contaminants, leaving your pumpkin looking cleaner and brighter.
Step-by-Step Guide: How to Bleach a Pumpkin
Preparation is Key
Before you start, gather the necessary materials:
- Bleach: Regular household bleach is suitable.
- Water: For creating the bleach solution.
- Large Container: A tub, bucket, or sink large enough to submerge the pumpkin.
- Gloves: To protect your skin from the bleach.
- Eye Protection: Safety glasses or goggles to prevent eye irritation.
- Sponge or Cloth: For cleaning the pumpkin.
- Optional: Scrub brush for removing stubborn dirt.
Creating the Bleach Solution
The ideal bleach solution is a diluted mixture of bleach and water. A common ratio is 1 part bleach to 10 parts water. For example, if you’re using a gallon of water, add approximately 1.25 cups of bleach. Always add bleach to water, never the other way around, to avoid potentially dangerous reactions. Mix the solution thoroughly.
Cleaning the Pumpkin
Before submerging the pumpkin, clean it thoroughly. Use a sponge or cloth to remove any dirt, debris, or loose particles from the surface. For stubborn dirt, a scrub brush can be helpful. Pay particular attention to crevices and areas where dirt tends to accumulate. This step ensures the bleach solution can effectively penetrate and disinfect the pumpkin’s surface. Make sure that you bleach a pumpkin with clean surface for best results.
Submerging the Pumpkin
Carefully submerge the pumpkin in the bleach solution. Ensure the entire pumpkin is fully immersed. If the pumpkin floats, you may need to weigh it down with a heavy object, such as a brick or a sealed container filled with water. Let the pumpkin soak in the solution for approximately 15-30 minutes. This allows the bleach to effectively kill any mold spores and bacteria present on the surface.
Rinsing and Drying
After soaking, remove the pumpkin from the bleach solution and rinse it thoroughly with clean water. This removes any residual bleach and prevents potential discoloration. Pat the pumpkin dry with a clean towel or allow it to air dry completely. Make sure the pumpkin is completely dry before displaying it, as moisture can promote mold growth. By doing all of this, you can bleach a pumpkin effectively. [See also: How to Carve the Perfect Pumpkin]
Bleaching Carved Pumpkins: Extra Considerations
Carved pumpkins are even more susceptible to decay due to the exposed flesh. When you bleach a pumpkin that’s been carved, take extra precautions:
- Inside and Out: Ensure the bleach solution reaches all interior surfaces of the pumpkin.
- Shorter Soak Time: Carved pumpkins may absorb more bleach, so reduce the soaking time to 10-15 minutes.
- Thorough Rinsing: Rinse the interior thoroughly to remove any bleach residue.
Safety Precautions When Bleaching Pumpkins
Working with bleach requires caution to protect yourself and your surroundings:
- Ventilation: Work in a well-ventilated area to avoid inhaling bleach fumes.
- Protective Gear: Always wear gloves and eye protection.
- Avoid Mixing: Never mix bleach with other cleaning products, especially ammonia, as this can create toxic gases.
- Child and Pet Safety: Keep bleach and bleach solutions out of reach of children and pets.
- Proper Disposal: Dispose of the bleach solution properly, following local regulations.
Alternative Pumpkin Preservation Methods
While bleaching is an effective method, other options exist for preserving your pumpkins:
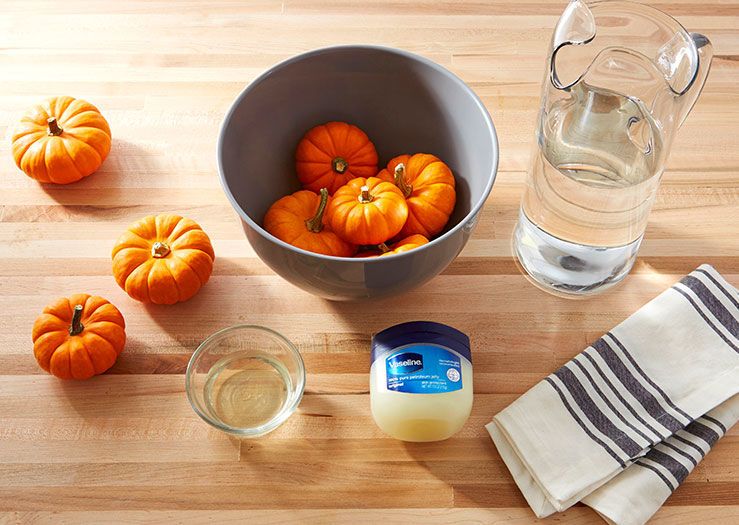
- Petroleum Jelly: Applying a thin layer of petroleum jelly to the cut surfaces of carved pumpkins can help seal them and prevent moisture loss.
- Acrylic Sealant: Spraying the inside of a carved pumpkin with acrylic sealant can create a protective barrier against mold and bacteria.
- Vinegar Soak: Soaking the pumpkin in a vinegar solution (1 part vinegar to 10 parts water) can also help kill mold spores.
- Commercial Pumpkin Preservatives: Several commercial products are specifically designed to preserve pumpkins. Follow the manufacturer’s instructions carefully.
Troubleshooting Common Issues
Even with careful preparation, you might encounter some issues when you bleach a pumpkin:
- Discoloration: Excessive bleach exposure can cause discoloration. If this occurs, try applying a thin layer of vegetable oil to restore the pumpkin’s color.
- Softening: Over-soaking can soften the pumpkin’s flesh. Reduce the soaking time in future attempts.
- Mold Regrowth: If mold reappears, repeat the bleaching process or try a different preservation method.
Beyond Preservation: Creative Uses for Bleached Pumpkins
Once you bleach a pumpkin, you can get creative with your fall decor. Consider these ideas:
- Painted Pumpkins: Use acrylic paints to create intricate designs on your bleached pumpkin.
- Decoupage: Apply decorative paper or fabric to the pumpkin’s surface using decoupage techniques.
- Glitter Pumpkins: Coat the pumpkin with glue and sprinkle glitter for a sparkling effect.
- Monogrammed Pumpkins: Personalize your pumpkin with your initials or family name.
The Science Behind Bleaching: How It Works
Bleach, specifically sodium hypochlorite (NaClO), is a powerful oxidizing agent. When you bleach a pumpkin, the sodium hypochlorite disrupts the cellular structure of mold and bacteria, effectively killing them. The process involves the oxidation of proteins and other organic molecules within the microorganisms, leading to their inactivation. This prevents further decay and extends the life of the pumpkin. The dilution of the bleach is crucial to avoid damaging the pumpkin’s surface while still providing sufficient disinfecting power. [See also: The History of Pumpkin Carving]
Choosing the Right Pumpkin for Bleaching
The success of bleaching also depends on the pumpkin itself. Select a pumpkin that is firm, free from bruises, and has a sturdy stem. Smaller pumpkins tend to hold up better to the bleaching process than larger ones. Avoid pumpkins with soft spots or signs of decay, as these are already compromised and may not benefit from bleaching.
Long-Term Pumpkin Care After Bleaching
Even after you bleach a pumpkin, ongoing care is important to maximize its lifespan:
- Keep it Dry: Avoid exposing the pumpkin to excessive moisture.
- Cool Environment: Store the pumpkin in a cool, dry place away from direct sunlight.
- Regular Inspection: Check the pumpkin regularly for signs of mold or decay.
Conclusion: Mastering the Art of Bleaching Pumpkins
Bleach a pumpkin is an effective and simple way to prolong the life of your fall decorations. By following these guidelines, you can enjoy your pumpkins for weeks, or even months, longer. Whether you’re preserving a jack-o’-lantern or simply want to add a touch of autumnal charm to your home, bleaching is a valuable technique to master. Remember to prioritize safety, choose the right pumpkin, and experiment with creative decorating ideas to make the most of your preserved gourds. Happy fall!
