How to Remove Rusted Screws: A Comprehensive Guide
Dealing with rusted screws is a common frustration for homeowners, mechanics, and DIY enthusiasts alike. A screw seized by rust can halt a project in its tracks and lead to damaged materials or even personal injury if not handled correctly. This guide provides a comprehensive overview of methods to remove rusted screws effectively, minimizing damage and maximizing your chances of success. From simple household remedies to specialized tools, we’ll cover everything you need to know to tackle this challenging task.
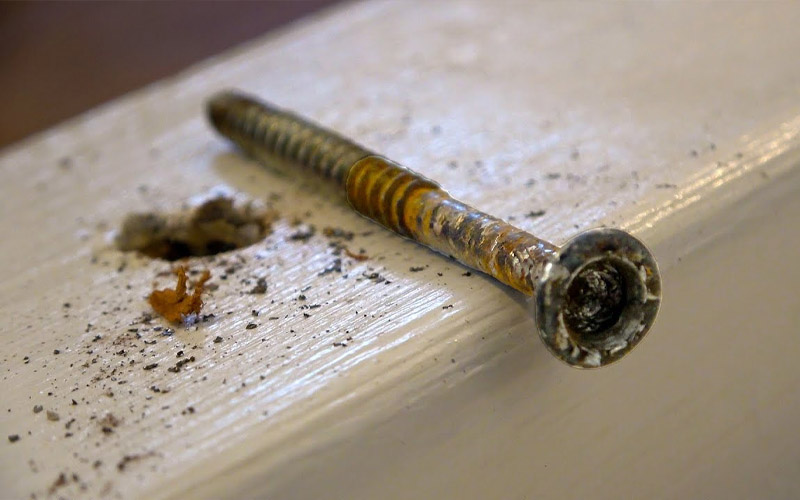
Understanding the Problem: Why Screws Rust
Before diving into solutions, it’s important to understand why screws rust in the first place. Rust, chemically known as iron oxide, forms when iron or steel is exposed to oxygen and moisture. This electrochemical process weakens the metal, causing it to expand and bond tightly with surrounding materials. Factors that accelerate rusting include:
- Environmental Conditions: High humidity, salt spray (in coastal areas), and frequent exposure to rain or snow all contribute to faster rusting.
- Material Composition: Some metals are more prone to rusting than others. Steel screws are particularly susceptible, while stainless steel offers better resistance.
- Lack of Protection: Screws lacking protective coatings, such as zinc plating or paint, are more vulnerable to corrosion.
Preparation is Key: Assessing the Situation
Before attempting to remove rusted screws, take a moment to assess the situation. Consider the following:
- Severity of Rust: Is it a light surface rust or a deep, penetrating corrosion?
- Screw Head Type: Is it a Phillips, flathead, Torx, or other type of screw?
- Material Surrounding the Screw: Is it wood, metal, plastic, or something else? This will influence your choice of methods.
- Accessibility: Can you easily access the screw head, or is it in a confined space?
Careful assessment will help you choose the most appropriate method and minimize the risk of damage.
Methods for Removing Rusted Screws
Here are several methods for removing rusted screws, ranging from simple to more advanced:
Using Penetrating Oil
Penetrating oil is often the first and simplest solution. It works by seeping into the threads of the screw, loosening the rust and allowing you to turn it. Here’s how to use it:
- Apply a generous amount of penetrating oil (such as WD-40, Liquid Wrench, or PB B’laster) to the screw head and surrounding area.
- Allow the oil to soak for at least 15-30 minutes, or even longer for heavily rusted screws. Overnight soaking is often beneficial.
- Tap the screw head lightly with a hammer. This can help the oil penetrate further.
- Use a screwdriver that fits the screw head snugly. Apply firm, steady pressure while turning.
If the screw still doesn’t budge, repeat the process or try another method.
Applying Heat
Heat can help to expand the metal around the screw, breaking the bond of the rust. Here’s how to use heat:
- Use a heat gun or soldering iron to heat the screw head. Be careful not to overheat the surrounding material, especially if it’s wood or plastic.
- Apply heat for 30-60 seconds.
- Immediately try to turn the screw with a screwdriver.
Caution: Be extremely careful when using heat, as it can damage surrounding materials or cause burns. Always wear appropriate safety gear, such as gloves and eye protection.
Using a Screw Extractor
A screw extractor is a specialized tool designed to remove rusted screws with stripped or damaged heads. It works by biting into the screw head and providing a new grip for turning.
- Select a screw extractor that is slightly smaller than the diameter of the screw head.
- Use a drill to create a pilot hole in the center of the screw head.
- Insert the screw extractor into the pilot hole.
- Turn the extractor counterclockwise with a wrench or tap handle. The extractor will bite into the screw head and eventually turn it out.
Screw extractors can be very effective, but they can also break if too much force is applied. Use caution and follow the manufacturer’s instructions carefully.
Using an Impact Driver
An impact driver is a powerful tool that delivers both rotational force and hammering action. This can be very effective for loosening rusted screws.
- Select the appropriate bit for the screw head.
- Position the impact driver on the screw head.
- Apply firm pressure and trigger the impact driver. The hammering action will help to break the rust bond.
Impact drivers are best used on screws that are not easily accessible or are heavily rusted. They can be aggressive, so use caution to avoid damaging the surrounding material.
Creating a New Screw Head
If the screw head is too damaged to grip, you can try creating a new one using a rotary tool (such as a Dremel) with a cutting wheel.
- Use the cutting wheel to create a slot across the top of the screw head.
- Use a flathead screwdriver to turn the screw out.
This method requires a steady hand and can be time-consuming, but it can be effective for removing rusted screws with severely damaged heads.
Using Household Remedies
Several household remedies can also be used to help loosen rusted screws:
- Vinegar: Soak a cloth in vinegar and wrap it around the screw head. Let it sit for several hours or overnight. Vinegar is a mild acid that can help to dissolve rust.
- Baking Soda Paste: Mix baking soda with water to create a thick paste. Apply the paste to the screw head and let it sit for several hours. Baking soda can help to neutralize the rust.
- Lemon Juice: Similar to vinegar, lemon juice contains citric acid that can help to dissolve rust.
These remedies are generally less effective than penetrating oil or heat, but they are worth trying if you don’t have other options available.
Preventing Rust in the Future
Once you’ve successfully removed rusted screws, take steps to prevent rust from forming in the future:
- Use Stainless Steel Screws: Stainless steel is much more resistant to rust than steel.
- Apply a Protective Coating: Use a rust-inhibiting paint or coating on screws that are exposed to moisture.
- Store Screws Properly: Keep screws in a dry, airtight container.
- Regular Maintenance: Periodically inspect screws and apply a lubricant to prevent them from seizing.
When to Call a Professional
In some cases, removing rusted screws may be beyond your capabilities. If you’ve tried multiple methods and the screw still won’t budge, or if you’re concerned about damaging surrounding materials, it’s best to call a professional. A qualified mechanic or contractor will have the tools and expertise to safely remove rusted screws without causing further damage. [See also: Choosing the Right Screwdriver for the Job] [See also: Preventing Rust on Metal Surfaces]
Conclusion
Removing rusted screws can be a challenging task, but with the right tools and techniques, it is often possible to succeed. By understanding the causes of rust and using the appropriate methods, you can minimize damage and get your project back on track. Remember to always prioritize safety and wear appropriate protective gear. And if all else fails, don’t hesitate to call a professional for assistance. This comprehensive guide provides the necessary information to effectively remove rusted screws and prevent future occurrences. By following these steps, you can tackle this common problem with confidence and efficiency.
