
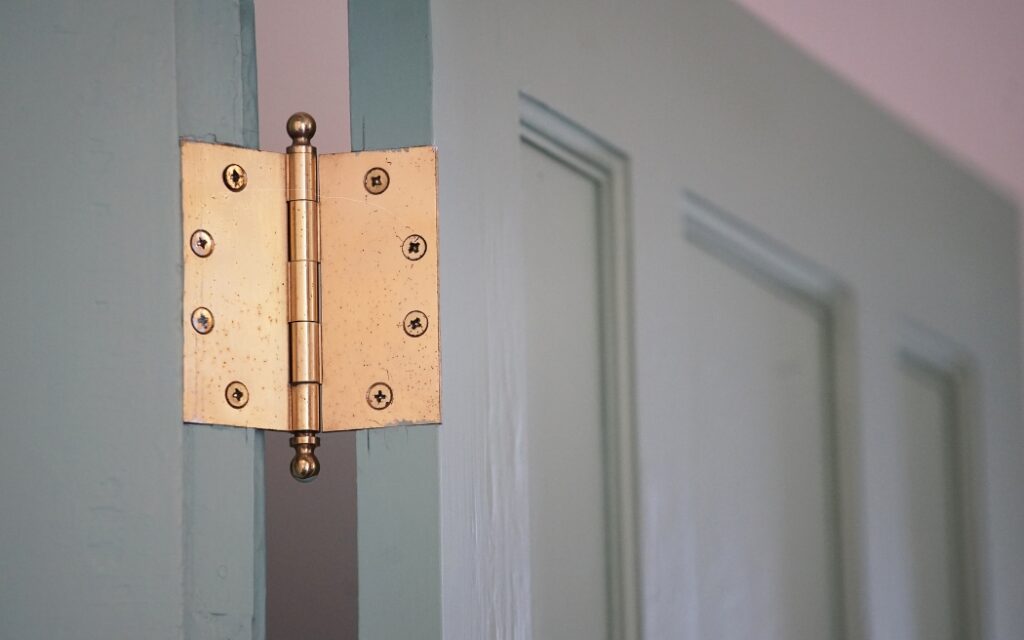
How to Clean Hinges on Doors: A Comprehensive Guide
Door hinges, often overlooked, play a crucial role in the functionality and aesthetics of our homes. Over time, they can accumulate dirt, grime, rust, and old paint, leading to squeaky doors, difficulty in operation, and an overall unappealing look. Knowing how to clean hinges on doors effectively can restore their smooth operation and prolong their lifespan. This comprehensive guide provides step-by-step instructions, various cleaning methods, and essential tips to keep your door hinges in top condition.
Why Cleaning Door Hinges Matters
Before diving into the cleaning process, it’s essential to understand why maintaining clean door hinges is important. Neglecting hinge maintenance can lead to several issues:
- Squeaky Doors: Accumulated dirt and rust can cause friction, resulting in annoying squeaking sounds every time the door is opened or closed.
- Stiff Operation: Grime buildup can impede the smooth movement of the hinge, making it difficult to open and close the door.
- Corrosion: Moisture and oxidation can lead to rust, weakening the hinge and potentially causing it to break.
- Aesthetic Appeal: Dirty or rusty hinges detract from the overall appearance of the door and the room.
Regular cleaning and maintenance can prevent these problems, ensuring your doors function smoothly and look their best. Let’s explore how to clean hinges on doors effectively.
Tools and Materials You’ll Need
Gathering the necessary tools and materials before you start will streamline the cleaning process. Here’s a list of what you’ll need:
- Screwdriver: For removing the hinges from the door.
- Hammer and Nail/Punch: To help remove the hinge pins.
- Penetrating Oil: WD-40 or similar lubricant to loosen stuck pins.
- Cleaning Solutions: White vinegar, dish soap, baking soda, or commercial rust remover.
- Containers: Buckets or bowls for soaking the hinges.
- Scrub Brush: A stiff-bristled brush for removing dirt and grime.
- Steel Wool or Sandpaper: For removing rust.
- Rags or Paper Towels: For wiping and drying.
- Safety Glasses and Gloves: To protect your eyes and hands.
- Optional: Paint stripper (if removing paint), paint (for touch-ups), primer (if painting).
Step-by-Step Guide: How to Clean Hinges on Doors
Follow these steps to clean your door hinges effectively:
Step 1: Removing the Door Hinges
Carefully remove the door from its frame to access the hinges more easily. Place shims under the door to support it while removing the screws. Use a screwdriver to unscrew the hinges from both the door and the frame. Keep the screws organized to avoid confusion during reinstallation.
Step 2: Removing the Hinge Pins
Use a hammer and nail or punch to tap the hinge pins out. Apply penetrating oil like WD-40 if the pins are stuck. Allow the oil to sit for a few minutes before attempting to remove the pins again. Once the pins are removed, separate the hinge leaves.
Step 3: Cleaning the Hinges
There are several methods for cleaning door hinges, depending on the level of dirt and rust:
Method 1: Soaking in White Vinegar
White vinegar is an effective and natural cleaning agent. Soak the hinges and pins in a bowl of white vinegar for several hours or overnight. The vinegar will help loosen dirt, grime, and rust. After soaking, scrub the hinges with a scrub brush to remove any remaining debris. Rinse with water and dry thoroughly. This is a great option for how to clean hinges on doors without harsh chemicals.
Method 2: Using Dish Soap and Water
For lightly soiled hinges, dish soap and water can be sufficient. Mix a few drops of dish soap with warm water. Soak the hinges for about 30 minutes, then scrub with a brush. Rinse and dry thoroughly. This method is ideal for regular maintenance and preventing buildup.
Method 3: Applying Baking Soda Paste
Baking soda is a mild abrasive that can help remove stubborn dirt and rust. Mix baking soda with water to create a paste. Apply the paste to the hinges and let it sit for about 15-20 minutes. Scrub with a brush and rinse with water. This method is particularly effective for removing minor rust spots.
Method 4: Using Commercial Rust Remover
For heavily rusted hinges, a commercial rust remover may be necessary. Follow the instructions on the product label carefully. Apply the rust remover to the hinges and let it sit for the recommended time. Scrub with a brush and rinse thoroughly. Ensure you wear safety glasses and gloves when using commercial rust removers. Always follow the manufacturer’s safety instructions.
Step 4: Removing Rust
If rust persists after cleaning, use steel wool or fine-grit sandpaper to gently remove it. Be careful not to scratch the hinge surface excessively. Work in small, circular motions until the rust is gone. Wipe away any residue with a clean cloth.
Step 5: Removing Paint (Optional)
If the hinges are covered in layers of old paint, you may need to use a paint stripper. Apply the paint stripper according to the product instructions. Let it sit for the recommended time, then scrape away the softened paint with a putty knife. Clean the hinges with a suitable solvent to remove any remaining paint stripper residue. Make sure to wear appropriate safety gear, including gloves and eye protection, when working with paint stripper. This step is crucial for how to clean hinges on doors that have been painted over.
Step 6: Lubricating the Hinges
Once the hinges are clean and dry, lubricate them with a silicone-based lubricant or penetrating oil. This will help prevent future squeaking and ensure smooth operation. Apply the lubricant to the hinge pins and the moving parts of the hinges. Wipe away any excess lubricant with a clean cloth.
Step 7: Reinstalling the Hinges
Reattach the hinge leaves to the door and the frame. Insert the hinge pins and tap them gently with a hammer until they are fully seated. Rehang the door and test its operation. If the door still squeaks or sticks, double-check the alignment of the hinges and the lubrication.
Step 8: Painting or Finishing (Optional)
If you removed paint from the hinges, you may want to repaint them to match the door and frame. Apply a primer first to ensure proper adhesion. Then, apply a coat of paint in the desired color. Allow the paint to dry completely before reinstalling the hinges. This step helps in maintaining the aesthetic appeal of your doors after you how to clean hinges on doors.
Tips for Maintaining Door Hinges
Regular maintenance can prevent the need for extensive cleaning in the future. Here are some tips to keep your door hinges in good condition:
- Regular Lubrication: Apply lubricant to the hinges every few months to prevent squeaking and ensure smooth operation.
- Wipe Clean: Periodically wipe the hinges with a damp cloth to remove dust and dirt.
- Address Issues Promptly: If you notice any signs of rust or stiffness, address them immediately to prevent further damage.
- Use Quality Hardware: When replacing hinges, choose high-quality hardware that is resistant to corrosion.
Troubleshooting Common Issues
Even with proper cleaning and maintenance, you may encounter some common issues with door hinges:
- Squeaking: Lubricate the hinges thoroughly. If the squeaking persists, the hinges may be misaligned or worn.
- Sticking: Clean and lubricate the hinges. Check for any obstructions that may be preventing smooth operation.
- Loose Hinges: Tighten the screws or replace them with longer screws if they are stripped.
- Rust: Remove rust promptly to prevent further corrosion. Consider using rust-resistant hinges in high-humidity areas.
Alternative Cleaning Solutions
Besides the methods mentioned earlier, here are some alternative cleaning solutions you can use:
- Lemon Juice and Salt: Mix lemon juice with salt to create a paste. Apply the paste to the hinges and let it sit for about 30 minutes. Scrub with a brush and rinse with water.
- Cola: Soak the hinges in cola for several hours. The phosphoric acid in cola can help dissolve rust.
- Hydrogen Peroxide: Apply hydrogen peroxide to the hinges and let it sit for about 10-15 minutes. Scrub with a brush and rinse with water.
Safety Precautions
When cleaning door hinges, it’s essential to take necessary safety precautions:
- Wear Safety Glasses: Protect your eyes from debris and cleaning solutions.
- Wear Gloves: Protect your hands from chemicals and sharp edges.
- Work in a Well-Ventilated Area: When using chemical cleaners, ensure proper ventilation to avoid inhaling harmful fumes.
- Follow Product Instructions: Always read and follow the instructions on cleaning products and paint strippers.
- Dispose of Waste Properly: Dispose of used cleaning solutions and materials according to local regulations.
The Takeaway: Keeping Your Hinges Clean
Knowing how to clean hinges on doors is a simple yet effective way to maintain the functionality and appearance of your home. By following the steps outlined in this guide, you can keep your door hinges clean, lubricated, and free from rust, ensuring smooth operation and prolonging their lifespan. Regular maintenance and prompt attention to any issues will save you time and money in the long run. So, grab your tools and get started on making your doors swing smoothly and silently once again.
Remember, a little effort goes a long way in preserving the integrity of your doors and enhancing the overall appeal of your living space. By keeping your hinges clean, you contribute to a well-maintained and comfortable home environment.
Now you know how to clean hinges on doors, so go ahead and give your doors the care they deserve! [See also: How to Fix a Squeaky Door] and [See also: Best Door Lubricants]
