Conquering Corrosion: A Comprehensive Guide to Removing Rusty Nuts and Bolts
Rusty nuts and bolts are a common frustration for mechanics, DIY enthusiasts, and anyone working with machinery or equipment. The relentless grip of rust can render even the simplest tasks incredibly difficult, potentially leading to damaged tools, stripped threads, and wasted time. This article provides a comprehensive guide to effectively removing rusty nuts and bolts, covering various techniques, tools, and preventative measures. Understanding the science behind corrosion and employing the right methods can save you significant headaches and ensure the longevity of your equipment.
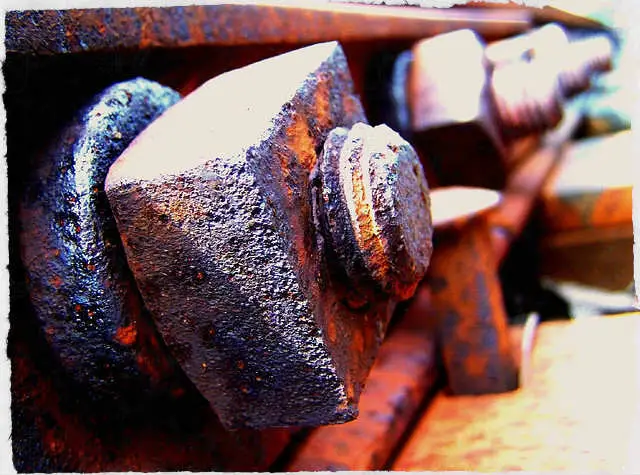
Understanding the Enemy: The Science of Rust
Before diving into removal techniques, it’s crucial to understand what causes rust. Rust, or iron oxide, is the result of a chemical reaction between iron, oxygen, and moisture. This electrochemical process weakens the metal, creating a brittle, flaky layer that binds nuts and bolts together. The presence of salt, acids, or other corrosive substances accelerates this process. Recognizing the factors that contribute to rust formation allows for better prevention strategies.
Assessing the Situation: Damage Control Begins Here
Before attempting any removal method, carefully assess the severity of the rust and the surrounding components. Are the rusty nuts and bolts easily accessible? Is there a risk of damaging nearby parts? A thorough assessment will help you choose the most appropriate and least destructive method. Start with the least aggressive approach and gradually increase the intensity as needed. Remember, patience is key when dealing with stubborn rusty nuts and bolts.
The Arsenal: Essential Tools for Rust Removal
Having the right tools on hand is essential for successfully removing rusty nuts and bolts. Here are some must-have items:
- Penetrating Oil: A good penetrating oil is your first line of defense. It works by seeping into the threads and breaking down the rust, loosening the bond between the nut and bolt.
- Wrenches and Sockets: Use high-quality wrenches and sockets that fit snugly. Avoid using adjustable wrenches, as they can slip and round off the rusty nuts and bolts.
- Hammer: A hammer can be used to gently tap the bolt head or nut, helping to break the rust’s hold.
- Heat Gun or Torch: Applying heat can expand the metal and further loosen the rust. Use caution and avoid overheating, which can damage the metal or surrounding components.
- Bolt Extractor Set: These specialized tools are designed to grip rounded or stripped rusty nuts and bolts.
- Wire Brush: A wire brush is useful for removing loose rust and debris before applying penetrating oil or attempting removal.
- Safety Glasses and Gloves: Always wear safety glasses and gloves to protect yourself from flying debris and harsh chemicals.
Techniques for Removing Rusty Nuts and Bolts: A Step-by-Step Guide
Here’s a breakdown of various techniques, from the simplest to the most aggressive, for removing rusty nuts and bolts:
Penetrating Oil Soak
This is often the first and most effective step. Generously apply penetrating oil to the rusty nuts and bolts and let it soak for at least 15-30 minutes, or even overnight for severely rusted components. Reapply the oil periodically to keep the area saturated. The longer the oil has to penetrate, the better the chances of success. Some popular penetrating oils include PB Blaster, Liquid Wrench, and Kroil. [See also: Best Penetrating Oils for Automotive Use]
Tapping and Vibration
After soaking the rusty nuts and bolts in penetrating oil, gently tap the bolt head or nut with a hammer. This vibration can help break the rust’s bond and allow the penetrating oil to seep deeper into the threads. Avoid hitting too hard, as this can damage the bolt or surrounding components.
Wrenching Techniques
Choose the correct size wrench or socket and ensure it fits snugly on the nut or bolt. Apply steady, even pressure. Avoid jerking or forcing the wrench, as this can strip the threads. If the nut or bolt is particularly stubborn, try using a longer wrench for increased leverage. If possible, use a six-point socket instead of a twelve-point socket, as it provides a better grip and reduces the risk of rounding off the rusty nuts and bolts.
Heat Application
Applying heat can expand the metal and loosen the rust’s grip. Use a heat gun or torch to heat the nut or bolt for a short period. Be careful not to overheat the metal, as this can weaken it or damage surrounding components. After heating, immediately try to loosen the rusty nuts and bolts while the metal is still warm. [See also: Using Heat to Remove Stuck Bolts]
Bolt Extractor Tools
If the head of the rusty nuts and bolts is rounded or stripped, a bolt extractor set can be a lifesaver. These tools are designed to grip the damaged head and allow you to apply torque. Follow the manufacturer’s instructions carefully when using a bolt extractor. There are various types of bolt extractors available, so choose the one that best suits your needs.
The Nuclear Option: Cutting and Replacement
In extreme cases, the only option may be to cut the rusty nuts and bolts off. Use a cutting wheel or saw to carefully cut through the bolt. Be extremely cautious to avoid damaging surrounding components. After cutting, you will need to replace the rusty nuts and bolts with new ones. This method should be considered a last resort, as it requires more effort and expense.
Prevention is Better Than Cure: Preventing Rust in the First Place
The best way to deal with rusty nuts and bolts is to prevent rust from forming in the first place. Here are some preventative measures:
- Apply Anti-Seize Compound: Apply a thin layer of anti-seize compound to the threads of bolts and nuts before assembly. This will prevent them from seizing due to rust or corrosion.
- Use Galvanized or Stainless Steel Fasteners: These materials are more resistant to rust and corrosion than standard steel.
- Regular Maintenance: Regularly inspect and clean equipment to remove dirt, debris, and moisture, which can accelerate rust formation.
- Protective Coatings: Apply protective coatings, such as paint or rust inhibitors, to metal surfaces to shield them from the elements.
- Proper Storage: Store equipment in a dry, well-ventilated area to minimize exposure to moisture.
Conclusion: Winning the Battle Against Rust
Dealing with rusty nuts and bolts can be a challenging task, but with the right tools, techniques, and preventative measures, you can conquer corrosion and keep your equipment in good working order. Remember to assess the situation carefully, choose the appropriate method, and exercise patience. By understanding the science of rust and implementing preventative strategies, you can minimize the frustration and expense associated with this common problem. So, the next time you encounter rusty nuts and bolts, approach the situation with confidence and the knowledge to get the job done right. Regular maintenance and proactive measures are key to preventing future occurrences, ensuring the longevity and reliability of your equipment. Don’t let rust win – fight back with knowledge and the right tools!
