Mastering the Removal of Silicone Caulk: A Comprehensive Guide
Silicone caulk is a ubiquitous sealant found in homes and businesses, prized for its flexibility and water resistance. However, its longevity doesn’t always last forever. Whether it’s cracked, discolored, or simply outdated, the removal of silicone caulk becomes a necessary task. This comprehensive guide provides a step-by-step approach to effectively and safely removing old silicone caulk, ensuring a clean surface for a fresh application. Understanding the process of removal of silicone caulk is essential for anyone undertaking home improvement projects, from bathroom renovations to kitchen upgrades. We’ll cover everything from necessary tools to advanced techniques, making the removal of silicone caulk a manageable task for both beginners and experienced DIY enthusiasts.
Why Remove Silicone Caulk?
Several reasons might necessitate the removal of silicone caulk. Over time, silicone can degrade due to exposure to moisture, UV light, and temperature fluctuations. This degradation leads to cracks, shrinkage, and loss of adhesion, compromising its sealing properties. Mold and mildew growth are also common issues, especially in damp environments like bathrooms and kitchens. Discolored or stained caulk can detract from the aesthetic appeal of a space, prompting its replacement. Moreover, when renovating or replacing fixtures, the old caulk must be removed to ensure a proper seal with the new components. Properly managing the removal of silicone caulk ensures a clean and effective base for any new sealant.
Tools and Materials Needed for Silicone Caulk Removal
Before embarking on the removal of silicone caulk, gather the necessary tools and materials. Having everything readily available will streamline the process and minimize frustration. Here’s a list of essential items:
- Utility Knife or Caulk Removal Tool: A sharp utility knife with a retractable blade or a specialized caulk removal tool is crucial for cutting and scoring the caulk.
- Putty Knife or Scraper: A stiff putty knife or scraper helps to lift and remove the loosened caulk.
- Pliers or Needle-Nose Pliers: These tools are useful for gripping and pulling out stubborn pieces of caulk.
- Heat Gun or Hair Dryer (Optional): Applying heat can soften the caulk, making it easier to remove. Use caution to avoid damaging surrounding surfaces.
- Silicone Caulk Remover Solvent: Chemical solvents designed for removal of silicone caulk can dissolve the caulk residue. Follow the manufacturer’s instructions carefully.
- Clean Rags or Paper Towels: For wiping away debris and solvent.
- Safety Glasses: To protect your eyes from flying debris.
- Gloves: To protect your hands from solvents and sharp tools.
- Household Cleaner or Degreaser: To clean the surface after removal of silicone caulk.
Step-by-Step Guide to Removing Silicone Caulk
Follow these steps for effective removal of silicone caulk:
Step 1: Prepare the Area
Before you begin, protect surrounding surfaces with drop cloths or painter’s tape. This will prevent accidental scratches or damage. Ensure adequate ventilation, especially if using chemical solvents. Put on your safety glasses and gloves.
Step 2: Score the Caulk
Using a utility knife or caulk removal tool, carefully score along both edges of the caulk bead. Apply firm, even pressure to cut through the caulk without damaging the underlying surface. Make multiple passes if necessary. This scoring is crucial for facilitating the removal of silicone caulk in larger pieces.
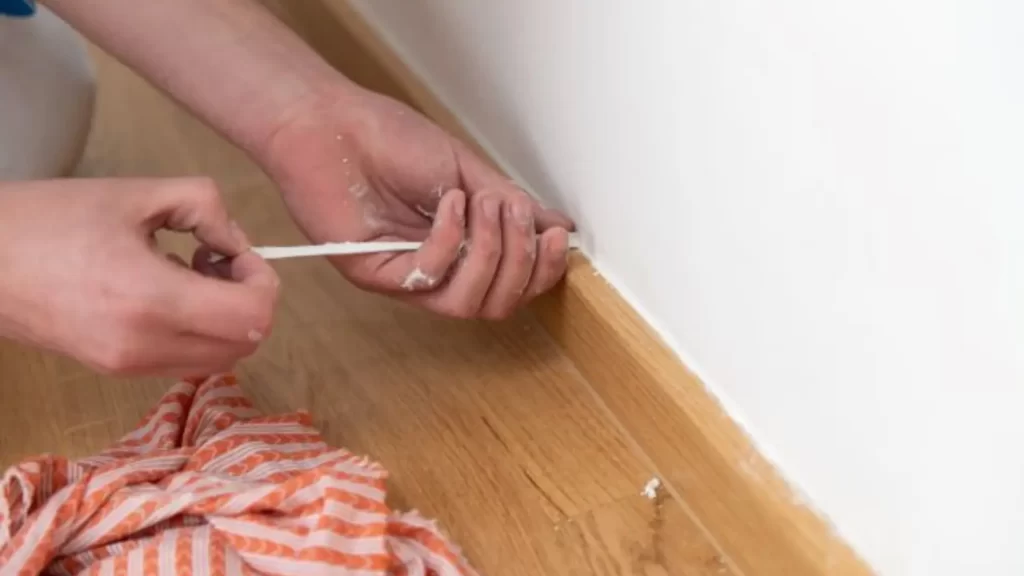
Step 3: Loosen the Caulk
Insert the putty knife or scraper under the scored caulk and gently pry it away from the surface. Work along the entire length of the caulk bead, gradually loosening it. If the caulk is particularly stubborn, use pliers or needle-nose pliers to grip and pull it away.
Step 4: Apply Heat (Optional)
If the caulk is proving difficult to remove, apply heat using a heat gun or hair dryer. Hold the heat source a few inches away from the caulk and move it back and forth to avoid overheating. The heat will soften the caulk, making it more pliable and easier to remove. Be cautious not to scorch or damage surrounding materials.
Step 5: Use a Silicone Caulk Remover Solvent (If Necessary)
For stubborn residue, apply a silicone caulk remover solvent according to the manufacturer’s instructions. These solvents are specifically designed to dissolve silicone, making it easier to scrape away. Apply the solvent liberally and allow it to sit for the recommended time. Then, use a putty knife or scraper to remove the softened residue. Ensure proper ventilation when using these solvents and avoid contact with skin and eyes.
Step 6: Clean the Surface
After removing the bulk of the caulk, clean the surface thoroughly to remove any remaining residue. Use a household cleaner or degreaser and a clean rag to wipe away any traces of silicone. For stubborn residue, try using a scouring pad or steel wool, but be careful not to scratch delicate surfaces. A clean surface is essential for proper adhesion of the new caulk.
Tips and Tricks for Easier Silicone Caulk Removal
- Work Slowly and Methodically: Rushing the process can lead to damaged surfaces and incomplete removal of silicone caulk.
- Use the Right Tools: Investing in quality tools designed for caulk removal can significantly improve the efficiency and effectiveness of the process.
- Apply Heat Sparingly: Overheating can damage surrounding surfaces. Use heat in short bursts and monitor the temperature carefully.
- Choose the Right Solvent: Different solvents are designed for different types of silicone. Read the labels carefully and choose a solvent that is compatible with the type of caulk you are removing.
- Ventilate the Area: When using chemical solvents, ensure adequate ventilation to avoid inhaling harmful fumes.
- Clean Up Thoroughly: Remove all traces of old caulk before applying new caulk. This will ensure a proper seal and prevent future problems.
Common Mistakes to Avoid During Silicone Caulk Removal
Avoiding common mistakes can save time, effort, and potential damage. Here are some pitfalls to watch out for:
- Using the Wrong Tools: Using dull or inappropriate tools can make the process more difficult and increase the risk of damage.
- Applying Too Much Force: Forcing the caulk can damage the underlying surface. Work slowly and methodically, using the right tools and techniques.
- Ignoring Safety Precautions: Always wear safety glasses and gloves to protect yourself from flying debris and chemical solvents.
- Failing to Clean the Surface Properly: Leaving residue behind can prevent the new caulk from adhering properly.
- Using Abrasive Cleaners on Delicate Surfaces: Abrasive cleaners can scratch or damage delicate surfaces. Choose a cleaner that is appropriate for the material you are cleaning.
Alternatives to Chemical Solvents for Silicone Caulk Removal
While chemical solvents can be effective, some individuals prefer to avoid them due to concerns about fumes and potential health risks. Here are some alternative methods for removal of silicone caulk without using harsh chemicals:
- Vinegar: Soaking the caulk in vinegar can help to soften it, making it easier to remove. Apply vinegar to the caulk and let it sit for several hours before attempting to remove it.
- Baking Soda Paste: A paste made from baking soda and water can be used to scrub away caulk residue. Apply the paste to the residue and scrub gently with a brush or scouring pad.
- Steam: Using a steam cleaner can help to loosen the caulk and make it easier to remove. Direct the steam at the caulk for several seconds at a time, then use a putty knife or scraper to remove it.
- Mechanical Methods: Employing tools like oscillating multi-tools with scraper attachments can provide a precise and controlled way to mechanically remove caulk without chemicals.
Preparing the Surface for New Silicone Caulk
Once the old caulk has been removed, it’s crucial to prepare the surface for the new application. This ensures a strong and durable seal. Follow these steps:
- Clean the Surface: Remove any remaining residue, dirt, or debris. Use a household cleaner or degreaser and a clean rag.
- Dry the Surface: Ensure the surface is completely dry before applying new caulk. Moisture can prevent the caulk from adhering properly.
- Apply Painter’s Tape: Use painter’s tape to create clean, crisp lines. Apply the tape along both edges of the joint, leaving a small gap for the caulk.
- Prime the Surface (Optional): For porous surfaces, consider applying a primer to improve adhesion.
Conclusion
The removal of silicone caulk is a manageable task with the right tools, techniques, and patience. By following the steps outlined in this guide, you can effectively remove old caulk and prepare the surface for a fresh application. Whether you’re a seasoned DIY enthusiast or a novice homeowner, mastering the art of removal of silicone caulk will empower you to maintain and improve your living spaces. Remember to prioritize safety, work methodically, and choose the right tools and materials for the job. With a little effort, you can achieve professional-looking results and enjoy a clean, watertight seal for years to come. [See also: Applying Silicone Caulk Like a Pro] [See also: Choosing the Right Type of Caulk for Your Project]
