How to Clean a Keyboard: A Comprehensive Guide to Keeping Your Keyboard Germ-Free
In today’s digital age, the keyboard is an indispensable tool. Whether you’re typing emails, writing reports, or gaming, your keyboard is a constant companion. However, this constant use makes it a breeding ground for dust, crumbs, and germs. Learning how to clean a keyboard effectively is crucial for maintaining hygiene and prolonging its lifespan. This comprehensive guide provides a step-by-step approach to keeping your keyboard clean and germ-free.
Why Cleaning Your Keyboard Matters
Before diving into the cleaning process, it’s important to understand why it’s necessary. Keyboards harbor more germs than you might think. Studies have shown that keyboards can contain bacteria, viruses, and fungi, some of which can be harmful to your health. Regular cleaning not only improves hygiene but also prevents keys from sticking and ensures smooth operation.
- Hygiene: Reduce the risk of spreading germs and bacteria.
- Performance: Prevent keys from sticking due to accumulated debris.
- Longevity: Extend the lifespan of your keyboard by preventing damage from dust and grime.
- Aesthetics: A clean keyboard simply looks better and contributes to a more pleasant workspace.
Essential Tools for Cleaning a Keyboard
Gathering the right tools is the first step to effectively clean a keyboard. Here’s a list of essentials:
- Compressed Air: To dislodge loose particles from between the keys.
- Microfiber Cloths: For wiping surfaces without scratching.
- Isopropyl Alcohol (70%): A safe and effective disinfectant.
- Cotton Swabs: For cleaning hard-to-reach areas.
- Keycap Puller (Optional): For removing keycaps for a deeper clean.
- Small Brush: A soft-bristled brush can help remove stubborn debris.
- Vacuum Cleaner with Brush Attachment (Optional): For removing larger debris quickly.
Step-by-Step Guide to Cleaning a Keyboard
Follow these steps to thoroughly clean a keyboard:
Preparation
- Power Down: Disconnect the keyboard from your computer or turn it off if it’s a wireless keyboard. This prevents accidental key presses and potential damage.
- Gather Supplies: Ensure you have all the necessary tools and cleaning agents within reach.
- Workspace Setup: Choose a well-lit area with enough space to work comfortably.
Removing Loose Debris
- Turn the Keyboard Upside Down: Gently shake the keyboard upside down to dislodge any loose crumbs or dust.
- Compressed Air: Use compressed air to blow out debris from between the keys. Hold the can at an angle and use short bursts to avoid damaging the keyboard.
- Vacuum (Optional): If you have a vacuum cleaner with a brush attachment, use it to remove larger debris quickly. Be gentle to avoid damaging the keys.
Surface Cleaning
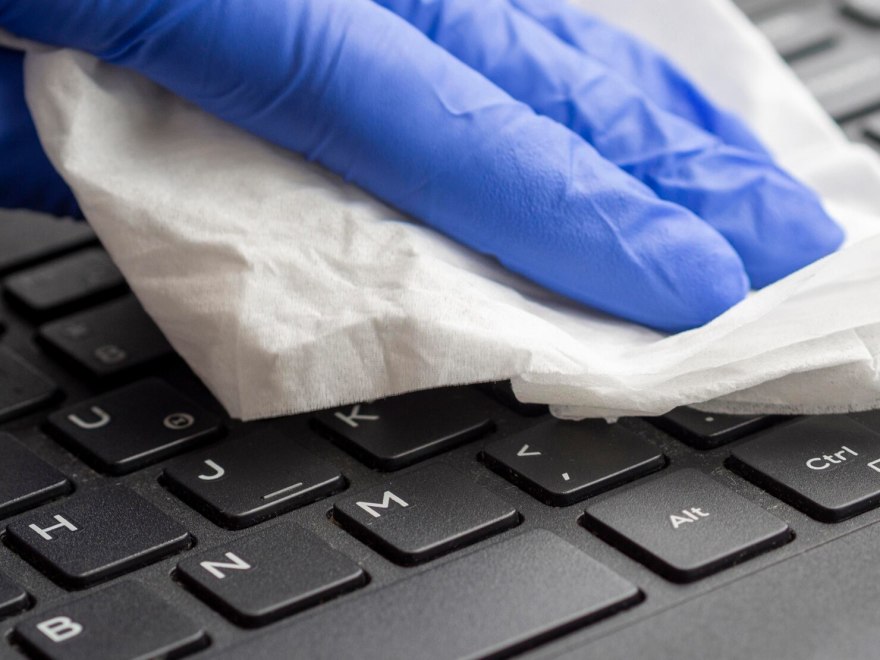
- Damp Cloth: Lightly dampen a microfiber cloth with isopropyl alcohol. Make sure the cloth is not too wet to prevent liquid from seeping into the keyboard.
- Wipe the Keys: Gently wipe each key and the surrounding surface to remove dirt and grime. Pay attention to areas that accumulate more dirt, such as around the spacebar and frequently used keys.
- Clean the Frame: Wipe the frame of the keyboard with the damp cloth to remove any accumulated dirt or fingerprints.
Deep Cleaning (Optional)
For a more thorough clean a keyboard, consider removing the keycaps. This allows you to clean the areas beneath the keys, which often accumulate a significant amount of dirt.
- Keycap Removal: Use a keycap puller to gently remove each keycap. If you don’t have a keycap puller, you can use a small, flathead screwdriver, but be careful not to scratch the keys.
- Cleaning the Keycaps: Wash the keycaps in warm, soapy water. Use a soft brush to scrub away any stubborn dirt. Rinse thoroughly and allow them to dry completely before reattaching.
- Cleaning the Keyboard Base: Use compressed air and a small brush to remove any remaining debris from the keyboard base. Wipe the surface with a damp cloth to remove any lingering dirt.
- Reassembly: Once everything is dry, reattach the keycaps to the keyboard. Ensure each keycap is properly aligned and securely attached.
Cleaning Hard-to-Reach Areas
- Cotton Swabs: Use cotton swabs dampened with isopropyl alcohol to clean hard-to-reach areas, such as around the edges of the keys and in crevices.
- Small Brush: A small, soft-bristled brush can be used to gently scrub away stubborn dirt from these areas.
Final Touches
- Dry Thoroughly: Ensure that all surfaces are completely dry before reconnecting or using the keyboard.
- Reconnect: Reconnect the keyboard to your computer or turn it on if it’s a wireless keyboard.
- Test: Test all the keys to ensure they are functioning properly.
Tips for Maintaining a Clean Keyboard
To keep your keyboard clean in the long run, consider these tips:
- Regular Cleaning: Make it a habit to clean a keyboard regularly, at least once a month.
- Avoid Eating at Your Desk: Food crumbs are a major contributor to keyboard dirt. Try to avoid eating at your desk or be extra careful when you do.
- Wash Your Hands: Wash your hands regularly, especially before using the keyboard.
- Use a Keyboard Cover: A keyboard cover can protect your keyboard from dust and spills.
- Store Properly: When not in use, cover your keyboard or store it in a clean, dry place.
Troubleshooting Common Keyboard Cleaning Issues
Even with careful cleaning, you might encounter some issues. Here are some common problems and how to address them:
- Sticky Keys: If keys are still sticky after cleaning, try removing the keycap and cleaning the switch underneath. You may need to use a specialized switch cleaner.
- Keys Not Working: If a key is not working after cleaning, ensure it is properly attached and that there is no debris blocking the switch. If the problem persists, the switch may be damaged.
- Discoloration: Some keyboards may become discolored after cleaning. Avoid using harsh chemicals or abrasive cleaners, which can damage the surface.
Choosing the Right Cleaning Products
Selecting the right cleaning products is crucial for maintaining the integrity of your keyboard. Avoid using harsh chemicals, such as bleach or ammonia, which can damage the keys and surface. Isopropyl alcohol (70%) is generally safe and effective for disinfecting keyboards. Always test any cleaning product on a small, inconspicuous area first to ensure it doesn’t cause discoloration or damage.
The Importance of Professional Cleaning Services
For those who prefer a hands-off approach, professional cleaning services can provide a thorough and reliable cleaning solution. These services often use specialized equipment and cleaning agents to ensure your keyboard is thoroughly cleaned and disinfected. While it may be more expensive than DIY cleaning, it can save you time and effort and ensure a high-quality result.
Conclusion
Knowing how to clean a keyboard is essential for maintaining hygiene, prolonging its lifespan, and ensuring smooth operation. By following the steps outlined in this guide and incorporating regular cleaning into your routine, you can keep your keyboard clean, germ-free, and functioning optimally. Whether you choose to do it yourself or opt for a professional cleaning service, a clean keyboard contributes to a healthier and more productive workspace. Remember to prioritize safety and use the right tools and cleaning products to avoid damaging your keyboard. A little bit of effort can go a long way in keeping your keyboard in top condition. [See also: How to Disinfect Your Workspace] Maintaining a clean keyboard is just one part of a healthy work environment.
