The Best Ways to Clean Your Keyboard: A Comprehensive Guide
In today’s digital age, the keyboard is an indispensable tool. Whether you’re a writer, programmer, gamer, or simply someone who uses a computer for daily tasks, a clean keyboard is crucial for both hygiene and functionality. Over time, keyboards accumulate dust, crumbs, and other debris, which can lead to sticky keys, reduced performance, and even the spread of germs. Knowing the best ways to clean your keyboard is essential for maintaining a healthy and efficient workspace. This comprehensive guide will walk you through various methods, from quick daily maintenance to deep cleaning techniques, ensuring your keyboard remains in top condition.
Why Cleaning Your Keyboard Matters
Before diving into the best ways to clean your keyboard, it’s important to understand why regular cleaning is necessary. Keyboards are breeding grounds for bacteria. Studies have shown that keyboards can harbor more germs than a toilet seat. Regular cleaning helps to reduce the risk of spreading infections and keeps your workspace hygienic. Moreover, accumulated dirt and debris can interfere with the keyboard’s functionality. Sticky keys, unresponsive buttons, and even complete keyboard failure can result from neglecting regular cleaning. By following these guidelines on the best ways to clean your keyboard, you’ll extend its lifespan and maintain optimal performance.
Essential Tools and Supplies
Before you begin cleaning, gather the necessary tools and supplies. Having everything on hand will make the process more efficient and prevent any interruptions. Here’s a list of essential items:
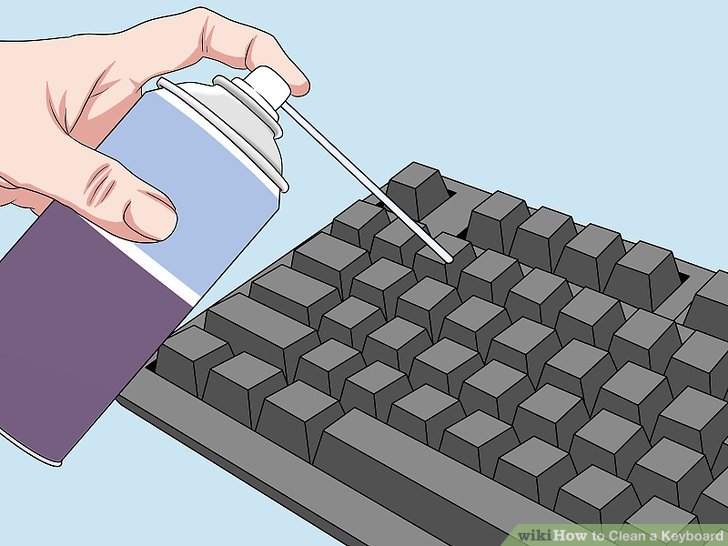
- Compressed air: Ideal for blasting away loose dust and debris from between the keys.
- Microfiber cloths: Soft and lint-free, perfect for wiping down surfaces without scratching.
- Isopropyl alcohol (70% or less): A disinfectant that effectively kills germs without damaging the keyboard.
- Cotton swabs: Useful for cleaning hard-to-reach areas and crevices.
- Keycap puller (optional): A tool specifically designed to remove keycaps for thorough cleaning.
- Small brush: A soft-bristled brush, such as a paintbrush or toothbrush, for gently removing debris.
- Vacuum cleaner with brush attachment (optional): Helpful for removing larger particles of dust and crumbs.
Having these tools readily available will ensure a smooth and effective cleaning process. Remember to always unplug your keyboard before cleaning to prevent any electrical damage.
Quick Daily Maintenance
Incorporating a quick daily cleaning routine can significantly reduce the buildup of dirt and grime on your keyboard. This simple process takes only a few minutes and can make a big difference in the long run. Here’s how to perform daily maintenance:
- Turn off and unplug your keyboard: This is a crucial safety step to prevent any electrical issues.
- Shake it out: Gently turn your keyboard upside down and shake it to dislodge any loose particles.
- Use compressed air: Hold the can of compressed air at a slight angle and direct short bursts of air between the keys to remove dust and debris.
- Wipe down the surface: Lightly dampen a microfiber cloth with water or a mild cleaning solution and wipe down the surface of the keys and the surrounding area.
By following these simple steps daily, you can maintain a cleaner and more hygienic keyboard with minimal effort. This is one of the best ways to clean your keyboard regularly.
Deep Cleaning Your Keyboard
For a more thorough cleaning, a deep cleaning process is necessary. This should be done periodically, depending on how frequently you use your keyboard and how dirty it gets. Here’s a step-by-step guide to deep cleaning your keyboard:
Step 1: Preparation
As with daily maintenance, start by turning off and unplugging your keyboard. Gather all the necessary tools and supplies listed earlier. Find a well-lit and comfortable workspace to make the process easier.
Step 2: Removing Keycaps (Optional)
If you have a mechanical keyboard or a keyboard with removable keycaps, consider removing them for a more thorough cleaning. Use a keycap puller to gently remove each keycap. If you don’t have a keycap puller, you can use a small, flat screwdriver or a similar tool, but be careful not to scratch the keycaps or the keyboard. Organize the keycaps in a way that you can easily remember their original positions, such as taking a photo before removing them.
Step 3: Cleaning the Keycaps
Once the keycaps are removed, you can clean them separately. Place the keycaps in a bowl of warm, soapy water. Let them soak for about 15-20 minutes to loosen any dirt and grime. After soaking, use a soft brush or cloth to scrub each keycap individually. Rinse the keycaps thoroughly with clean water and allow them to air dry completely before reattaching them to the keyboard.
Step 4: Cleaning the Keyboard Base
With the keycaps removed, you can now focus on cleaning the keyboard base. Use compressed air to blow away any remaining dust and debris. For stubborn dirt and grime, dampen a cotton swab with isopropyl alcohol and gently clean around the key switches and other hard-to-reach areas. Be careful not to saturate the keyboard with alcohol, as this could damage the internal components. [See also: How to Disassemble a Mechanical Keyboard]
Step 5: Reassembling the Keyboard
Once the keycaps and the keyboard base are completely dry, you can begin reassembling the keyboard. Refer to the photo or diagram you took earlier to ensure each keycap is placed in its correct position. Gently press each keycap into place until it clicks securely. Double-check that all the keycaps are properly aligned and functioning correctly.
Cleaning Different Types of Keyboards
The best ways to clean your keyboard can vary depending on the type of keyboard you have. Here are some specific considerations for different types of keyboards:
Mechanical Keyboards
Mechanical keyboards are known for their durability and customizable keycaps. The keycaps are typically easy to remove, making deep cleaning a straightforward process. Pay extra attention to cleaning the key switches, as they can accumulate dust and debris that affect their performance. [See also: Best Mechanical Keyboards for Gaming]
Membrane Keyboards
Membrane keyboards have a single membrane layer underneath the keys, which makes them more resistant to spills and easier to clean. However, the keycaps are often more difficult to remove, so focus on using compressed air and cotton swabs to clean around the keys.
Laptop Keyboards
Laptop keyboards are more delicate and require extra care. Avoid using excessive amounts of liquid when cleaning, as this could damage the internal components. Use compressed air to remove dust and debris, and gently wipe down the surface with a slightly damp microfiber cloth. [See also: Laptop Maintenance Tips]
Tips for Preventing Keyboard Buildup
Prevention is always better than cure. Here are some tips to help prevent the buildup of dirt and grime on your keyboard:
- Wash your hands regularly: This is the most effective way to prevent the transfer of germs and dirt to your keyboard.
- Avoid eating and drinking near your keyboard: Food particles and liquids can easily get trapped between the keys, leading to sticky keys and bacterial growth.
- Use a keyboard cover: A keyboard cover can protect your keyboard from dust, spills, and other contaminants.
- Regularly dust your workspace: A clean workspace will help to reduce the amount of dust and debris that accumulates on your keyboard.
Troubleshooting Common Keyboard Issues
Even with regular cleaning, you may encounter some common keyboard issues. Here are some troubleshooting tips:
- Sticky keys: If you have sticky keys, try removing the keycaps and cleaning the key switches with isopropyl alcohol.
- Unresponsive keys: Check for any physical obstructions that may be preventing the key from functioning properly. If the key is still unresponsive, it may need to be replaced.
- Keyboard not working: Ensure that the keyboard is properly connected to your computer. Try restarting your computer or updating the keyboard drivers.
Conclusion
Maintaining a clean keyboard is crucial for hygiene, performance, and longevity. By following the best ways to clean your keyboard outlined in this guide, you can keep your keyboard in top condition and prevent the buildup of dirt, germs, and debris. Whether you opt for a quick daily maintenance routine or a thorough deep cleaning, regular cleaning will ensure a more pleasant and efficient computing experience. Remember to always unplug your keyboard before cleaning and use the appropriate tools and supplies to avoid damaging your keyboard. With a little effort, you can enjoy a clean and functional keyboard for years to come. Understanding the best ways to clean your keyboard will also improve your overall work environment and productivity. Don’t underestimate the impact of a clean keyboard on your daily life. Taking the time to maintain it properly is an investment in your health and your productivity. By incorporating these best ways to clean your keyboard into your routine, you’ll ensure a cleaner, healthier, and more efficient workspace. This guide provides a comprehensive overview of the best ways to clean your keyboard, ensuring you have all the knowledge you need to keep your keyboard in pristine condition. Remember, regular cleaning is key to maintaining a healthy and functional keyboard. Choose the best ways to clean your keyboard that suit your needs and make it a part of your routine. A clean keyboard is a happy keyboard, and a happy keyboard leads to a more productive you. Implement these best ways to clean your keyboard today and experience the difference a clean workspace can make. So, take action now and start implementing these best ways to clean your keyboard for a better computing experience. You’ll be glad you did!
