How to Remove Silicone from Your Bath: A Comprehensive Guide
Silicone sealant is a fantastic material for creating waterproof seals around your bath, shower, and sink. However, over time, it can become discolored, cracked, or simply unsightly. Knowing how to remove silicone from bath surfaces effectively is essential for maintaining a clean and aesthetically pleasing bathroom. This comprehensive guide will walk you through the process step-by-step, providing you with the tools and techniques needed to achieve professional-looking results.
Why Remove Old Silicone?
Before diving into the how-to, let’s consider why you might need to remove silicone from bath areas in the first place:
- Mold and Mildew: Silicone is prone to mold and mildew growth, especially in damp environments like bathrooms. These organisms not only look unpleasant but can also pose health risks.
- Cracking and Peeling: As silicone ages, it can become brittle and start to crack or peel away from the surface. This compromises the seal and allows water to seep behind it, potentially causing water damage.
- Discoloration: Even without mold, silicone can become discolored over time due to soap scum, mineral deposits, and other bathroom grime.
- Aesthetic Reasons: Sometimes, you simply want to refresh the look of your bathroom, and replacing old silicone is a quick and easy way to do so.
Tools and Materials You’ll Need
Gathering the right tools and materials beforehand will make the remove silicone from bath process much smoother:
- Utility Knife or Razor Blade Scraper: For cutting and scraping away the bulk of the silicone.
- Silicone Removal Tool: A specialized tool designed to get under the silicone and lift it away. These are available at most hardware stores.
- Plastic Scraper: To avoid scratching delicate surfaces like acrylic or enamel.
- Old Rags or Paper Towels: For wiping up residue.
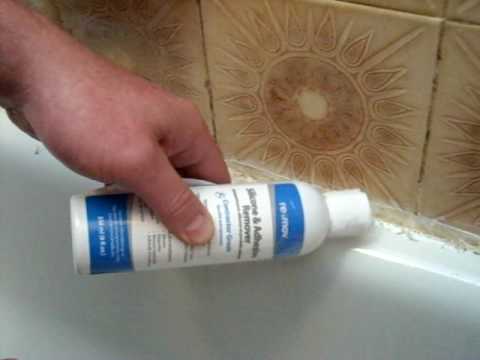
- White Spirit or Silicone Remover Solvent: To dissolve stubborn silicone residue.
- Spray Bottle: For applying the solvent.
- Gloves: To protect your hands from the solvent and silicone.
- Safety Glasses: To protect your eyes from flying debris.
- Ventilation: Ensure the room is well-ventilated, especially when using solvents.
Step-by-Step Guide to Removing Silicone
Follow these steps to effectively remove silicone from bath surfaces:
Step 1: Prepare the Area
Start by thoroughly cleaning the area around the silicone with a mild detergent and water. This will remove any loose debris and make it easier to see what you’re doing. Dry the area completely before proceeding.
Step 2: Score the Silicone
Using a sharp utility knife or razor blade scraper, carefully score along the edges of the silicone bead where it meets the bath and wall. Be careful not to scratch the surrounding surfaces. The goal is to create a clean break between the silicone and the surfaces it’s adhered to.
Step 3: Remove the Bulk of the Silicone
Insert the silicone removal tool or the tip of the utility knife under the scored edge of the silicone. Gently pry the silicone away from the surface. Work slowly and carefully, pulling the silicone away in long strips if possible. If the silicone is particularly stubborn, you may need to score it again or use a heat gun (on a low setting) to soften it slightly. Be extremely cautious when using a heat gun to avoid damaging surrounding materials.
Step 4: Remove Remaining Residue
Once you’ve removed the bulk of the silicone, you’ll likely be left with some residue. This is where the white spirit or silicone remover solvent comes in handy. Apply the solvent to the residue using a spray bottle or rag. Let it sit for the recommended time (usually a few minutes) to soften the silicone. Then, use a plastic scraper or a clean rag to gently scrub away the residue. Repeat this process as needed until all traces of silicone are gone.
Step 5: Clean and Dry the Surface
After removing all the silicone residue, thoroughly clean the area with a mild detergent and water to remove any traces of the solvent. Dry the surface completely before applying new silicone sealant. This is crucial for ensuring a good bond with the new sealant.
Tips and Tricks for Easier Silicone Removal
- Use a Specialized Silicone Removal Tool: These tools are designed to make the job easier and more efficient. They often have a curved blade that can get under the silicone and lift it away without damaging the surrounding surfaces.
- Soften the Silicone with Heat: A heat gun (on a low setting) can help soften stubborn silicone, making it easier to remove. Be careful not to overheat the silicone or damage the surrounding materials. A hairdryer can also work, albeit more slowly.
- Use the Right Solvent: White spirit or a specialized silicone remover solvent is essential for removing stubborn residue. Follow the manufacturer’s instructions carefully and ensure adequate ventilation.
- Be Patient: Removing silicone can be a time-consuming process, especially if it’s old and brittle. Don’t rush the job, and be prepared to repeat steps as needed.
- Protect Yourself: Wear gloves and safety glasses to protect your hands and eyes from the solvent and silicone.
Choosing and Applying New Silicone Sealant
Once you’ve successfully remove silicone from bath areas, you’ll need to apply new sealant to maintain a waterproof seal. Here are some tips for choosing and applying new silicone:
- Choose the Right Type of Silicone: Use a silicone sealant specifically designed for bathrooms and kitchens. These sealants are typically mold and mildew resistant.
- Prepare the Surface: Ensure the surface is clean, dry, and free of any debris.
- Apply the Silicone Evenly: Use a caulking gun to apply the silicone in a smooth, even bead.
- Smooth the Silicone: Use a wet finger or a sealant smoothing tool to create a smooth, professional-looking finish.
- Allow the Silicone to Cure: Follow the manufacturer’s instructions for curing time. This is typically 24-48 hours.
Preventing Future Silicone Problems
To minimize the need to remove silicone from bath areas in the future, consider these preventative measures:
- Regular Cleaning: Clean the silicone regularly with a mild detergent and water to prevent mold and mildew growth.
- Proper Ventilation: Ensure adequate ventilation in your bathroom to reduce moisture buildup.
- Use High-Quality Silicone: Invest in a high-quality silicone sealant that is specifically designed for bathrooms and kitchens.
- Reapply Silicone as Needed: Inspect the silicone regularly and reapply it as needed to maintain a waterproof seal.
Troubleshooting Common Issues
Even with careful planning, you might encounter some challenges when you remove silicone from bath areas. Here are some common issues and how to address them:
- Silicone is Too Hard to Remove: Try using a heat gun (on a low setting) to soften the silicone.
- Residue Won’t Come Off: Apply more solvent and let it sit for a longer period. You may also need to use a more aggressive scraper.
- Scratched the Surface: Use a polishing compound designed for the material to buff out the scratches.
- New Silicone Doesn’t Adhere: Make sure the surface is completely clean and dry before applying the new silicone. Also, ensure that you are using the correct type of silicone sealant.
Removing old silicone from your bath can seem like a daunting task, but with the right tools, techniques, and a bit of patience, you can achieve professional-looking results. By following the steps outlined in this guide, you can effectively remove silicone from bath surfaces, prevent future problems, and maintain a clean and aesthetically pleasing bathroom. Remember to prioritize safety by wearing gloves and eye protection, and always ensure adequate ventilation when working with solvents. [See also: How to Apply Silicone Caulk Like a Pro] [See also: Bathroom Cleaning Tips and Tricks] [See also: Preventing Mold and Mildew in Your Bathroom]
