How to Lubricate Door Hinges: A Comprehensive Guide to Stop Squeaks
Squeaky doors are a common household annoyance. That irritating noise every time you open or close a door can drive anyone crazy. The most frequent culprit behind these squeaks? Dry, unlubricated door hinges. Fortunately, learning how to lubricate door hinges is a simple DIY task that can eliminate the noise and extend the lifespan of your doors. This guide provides a step-by-step process for effectively lubricating your door hinges, along with tips and tricks to ensure lasting results. If you’re experiencing persistent squeaks, properly lubricating the door hinges is likely the solution you’re looking for.
Why Door Hinges Squeak
Before diving into the how-to, it’s helpful to understand why door hinges start to squeak in the first place. Several factors can contribute:
- Lack of Lubrication: Over time, the original lubricant on the hinge wears away, leaving metal surfaces rubbing against each other. This friction generates the squeaking sound.
- Dirt and Debris: Dust, dirt, and other particles can accumulate within the hinge, increasing friction and contributing to the noise.
- Rust and Corrosion: In humid environments or areas prone to moisture, rust can form on the hinges, causing them to bind and squeak.
- Loose Screws: While not directly causing the squeak, loose screws can allow the door to shift, putting additional stress on the hinges and exacerbating the problem.
Tools and Materials You’ll Need
Gathering the necessary tools and materials beforehand will make the process smoother and more efficient. Here’s what you’ll need to lubricate door hinges:
- Lubricant: Choose a lubricant specifically designed for hinges or moving parts. Options include:
- Penetrating Oil: WD-40 is a popular choice, but it’s best for initial cleaning and loosening. It doesn’t provide long-lasting lubrication.
- Silicone Spray: A good all-around lubricant that’s safe for most surfaces.
- Lithium Grease: A thicker grease that provides longer-lasting lubrication, especially for heavy doors.
- Dry Lubricant (Graphite Powder): Ideal for environments where you want to avoid attracting dust and dirt.
- Hammer and Nail or Punch: For tapping out the hinge pins.
- Screwdriver: To tighten any loose hinge screws.
- Clean Rags or Paper Towels: For wiping away excess lubricant and cleaning the hinges.
- Small Brush (Optional): For applying lubricant in hard-to-reach areas.
- Safety Glasses: To protect your eyes from lubricant spray.
- Drop Cloth or Newspaper: To protect the floor from drips.
Step-by-Step Guide: How to Lubricate Door Hinges
Follow these steps to effectively lubricate your door hinges and eliminate those annoying squeaks:
Step 1: Prepare the Area
Start by placing a drop cloth or newspaper under the door to protect your flooring from any drips or spills. This simple step can save you from having to clean up a messy situation later. Open the door and secure it in place to prevent it from swinging shut while you work. A doorstop or wedge can be helpful for this.
Step 2: Inspect the Hinges
Carefully examine the door hinges. Look for signs of rust, corrosion, dirt, or debris. Also, check if any of the screws are loose. Tightening loose screws can sometimes be enough to reduce squeaking, especially if the door is shifting and putting stress on the hinges. If the screws are stripped, consider replacing them with longer or wider screws for a more secure hold.
Step 3: Remove the Hinge Pins (Optional but Recommended)
For the most thorough lubrication, removing the hinge pins is highly recommended. This allows you to clean and lubricate the entire hinge mechanism. Here’s how to do it:
- Position a nail or punch at the bottom of the hinge pin.
- Gently tap the nail or punch with a hammer until the pin starts to move upwards.
- Once the pin is partially out, you should be able to pull it out completely with your fingers or pliers.
- Repeat this process for all hinge pins on the door.
Important Note: Removing all the hinge pins at once can make the door unstable. It’s best to remove and lubricate one hinge at a time to prevent the door from sagging or falling.
Step 4: Clean the Hinges
With the hinge pins removed, clean the hinges thoroughly. Use a clean rag or paper towel to wipe away any dirt, dust, or old lubricant. For stubborn grime, you can use a wire brush or a solvent cleaner. Make sure the hinges are completely dry before applying any new lubricant. Cleaning the hinges ensures that the new lubricant can properly adhere to the metal surfaces and provide optimal performance. This step is crucial for long-lasting squeak prevention.
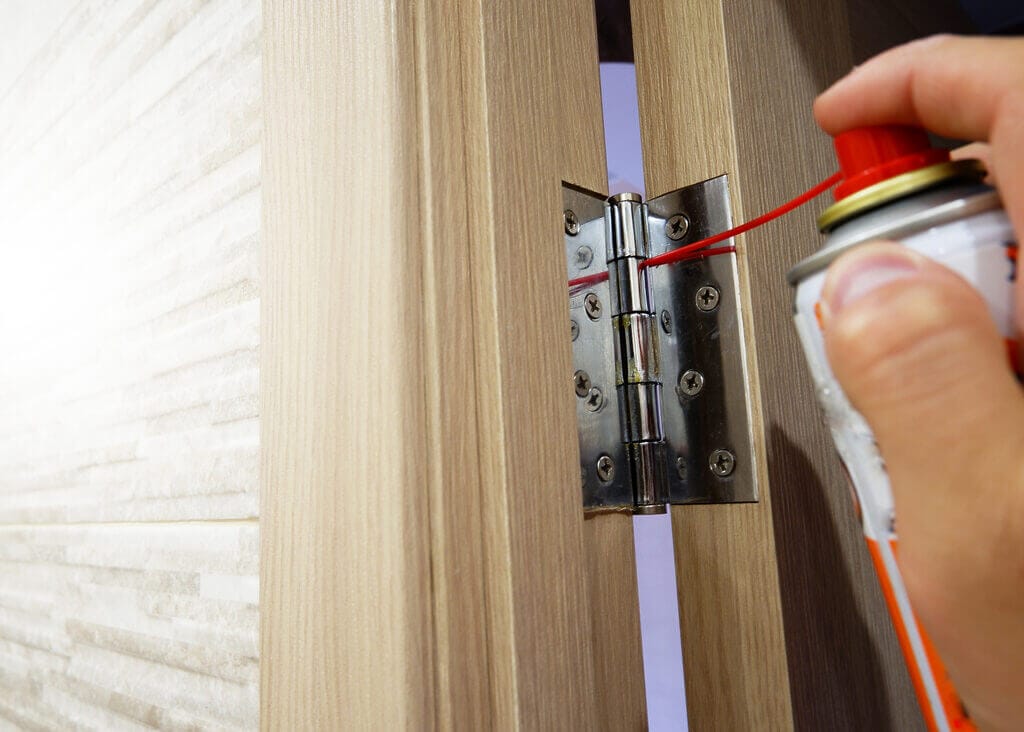
Step 5: Lubricate the Hinges and Pins
Now it’s time to apply the lubricant. If you removed the hinge pins, apply lubricant directly to the pins, coating them thoroughly. Also, spray or apply lubricant into the hinge barrels (the part of the hinge attached to the door and frame). Work the lubricant into the hinge mechanism by opening and closing the hinge several times. If you didn’t remove the pins, spray the lubricant directly into the hinge gaps, focusing on the areas where the metal surfaces rub together. [See also: Door Maintenance Tips] Remember to use the appropriate lubricant for your needs. Lithium grease, for example, may be more effective for heavier doors.
Step 6: Reinstall the Hinge Pins
Once you’ve lubricated the hinges and pins, reinstall the hinge pins. Tap them gently with a hammer if necessary to ensure they are fully seated. Make sure the pins are aligned correctly before tapping them in to avoid damaging the hinges. If the pins are difficult to reinsert, try rotating them slightly or applying a small amount of lubricant to the pin before insertion. This will help the pins slide in more easily.
Step 7: Test the Door
Open and close the door several times to distribute the lubricant and ensure that the squeaking is gone. If the door still squeaks, repeat the lubrication process, paying close attention to the areas where the noise seems to be originating. Sometimes, it takes a second application to fully eliminate the squeak. If the squeaking persists after multiple attempts, there may be another issue, such as a misaligned door or damaged hinges.
Step 8: Wipe Away Excess Lubricant
Use a clean rag or paper towel to wipe away any excess lubricant that may have dripped or splattered. This will prevent the lubricant from attracting dust and dirt, and it will also prevent it from staining your flooring or walls. Keeping the area clean will also make it easier to spot any future problems with the hinges. Regularly wiping down the hinges can also help prevent the buildup of grime and prolong the life of the lubricant.
Choosing the Right Lubricant
Selecting the right lubricant is crucial for achieving long-lasting results. Here’s a closer look at the different types of lubricants and their ideal applications:
- Penetrating Oil (e.g., WD-40): Excellent for loosening rusted or stuck parts. It penetrates quickly but doesn’t provide long-lasting lubrication. Best used as a cleaner before applying a more durable lubricant.
- Silicone Spray: A versatile lubricant that’s safe for use on most materials, including metal, plastic, and rubber. It’s water-resistant and provides good lubrication for general-purpose applications.
- Lithium Grease: A thicker grease that provides excellent lubrication and protection against wear and corrosion. Ideal for heavy-duty applications and doors that experience a lot of use.
- Dry Lubricant (Graphite Powder): A dry powder that provides lubrication without attracting dust and dirt. Ideal for environments where cleanliness is a concern. It’s also a good option for hinges that are exposed to extreme temperatures.
Consider the specific needs of your door hinges when choosing a lubricant. If you live in a humid environment, a lubricant with rust-inhibiting properties is a good choice. If your door is heavy and gets a lot of use, a thicker grease will provide better protection. If you want to avoid attracting dust and dirt, a dry lubricant is the way to go. Properly lubricating the door hinges depends on selecting the correct product.
Troubleshooting Common Issues
Sometimes, simply lubricating the door hinges isn’t enough to solve the problem. Here are some common issues and how to address them:
- Squeaking Persists: If the door continues to squeak after lubricating the hinges, try applying more lubricant or using a different type of lubricant. Also, check for other potential sources of the noise, such as the door rubbing against the frame.
- Loose Hinges: If the hinges are loose, tighten the screws. If the screw holes are stripped, replace the screws with longer or wider ones. You can also use wood glue and toothpicks to fill the stripped holes before reinserting the screws.
- Misaligned Door: If the door is misaligned, it may be putting undue stress on the hinges. Try adjusting the hinges or shimming the door to correct the alignment. [See also: How to Fix a Misaligned Door]
- Rusted Hinges: If the hinges are heavily rusted, you may need to replace them. Before replacing them, try soaking them in a rust remover to see if you can salvage them.
Preventative Maintenance
To prevent door hinges from squeaking in the future, incorporate regular maintenance into your routine. Here are some tips:
- Lubricate Regularly: Lubricate your door hinges every six months or as needed. Regular lubrication will keep the hinges working smoothly and prevent squeaks.
- Clean Regularly: Clean your door hinges regularly to remove dirt and debris. This will prevent the buildup of grime and prolong the life of the lubricant.
- Inspect Regularly: Inspect your door hinges regularly for signs of rust, corrosion, or loose screws. Addressing these issues early can prevent more serious problems down the road.
Conclusion
Knowing how to lubricate door hinges is a simple yet effective way to eliminate annoying squeaks and extend the lifespan of your doors. By following the steps outlined in this guide, you can easily maintain your door hinges and keep them working smoothly for years to come. Remember to choose the right lubricant for your needs and to perform regular maintenance to prevent future problems. Lubricating the door hinges is a task that anyone can do with minimal tools and effort. So, the next time you hear a squeak, don’t ignore it – grab your lubricant and get to work! By properly lubricating the door hinges, you can enjoy a quieter and more comfortable home.
